
Ever cringe when you hear your own voice on a recording? That feeling of "that's not what I sound like" is universal. And you're not wrong—it really doesn't sound the way you're used to hearing it. The reason is less about your voice and more about the physics of how sound travels from your vocal cords to your eardrums.
It’s a bit like being at a live concert versus hearing it on the radio. In the venue, you feel the bass thumping in your chest, a full-body experience. The radio only gives you the sound waves hitting your ears. The same principle applies to your own voice.
When you speak, you're getting a "dual-channel" feed. The first channel is air conduction—the sound waves that travel from your mouth, through the air, and into your eardrums. This is how everyone else on the planet hears you.
But you get a private, second channel: bone conduction. As your vocal cords vibrate, they send those vibrations directly through your skull and jaw bones to your inner ear. This internal pathway is the secret ingredient that makes your voice sound different in your head.
Bone conduction is much better at transmitting low frequencies. As a result, your voice sounds fuller, deeper, and richer to you than it does to anyone else. In fact, some studies show this internal perception can boost bass frequencies by as much as 10 to 15 decibels. You can find more insights about this phenomenon and how it shapes what you hear.
Your recorded voice isn't a "fake" version of you—it's the real version everyone else hears. The weirdness comes from hearing your voice without the added low-end frequencies that bone conduction provides.
This infographic breaks down the two distinct paths sound takes.
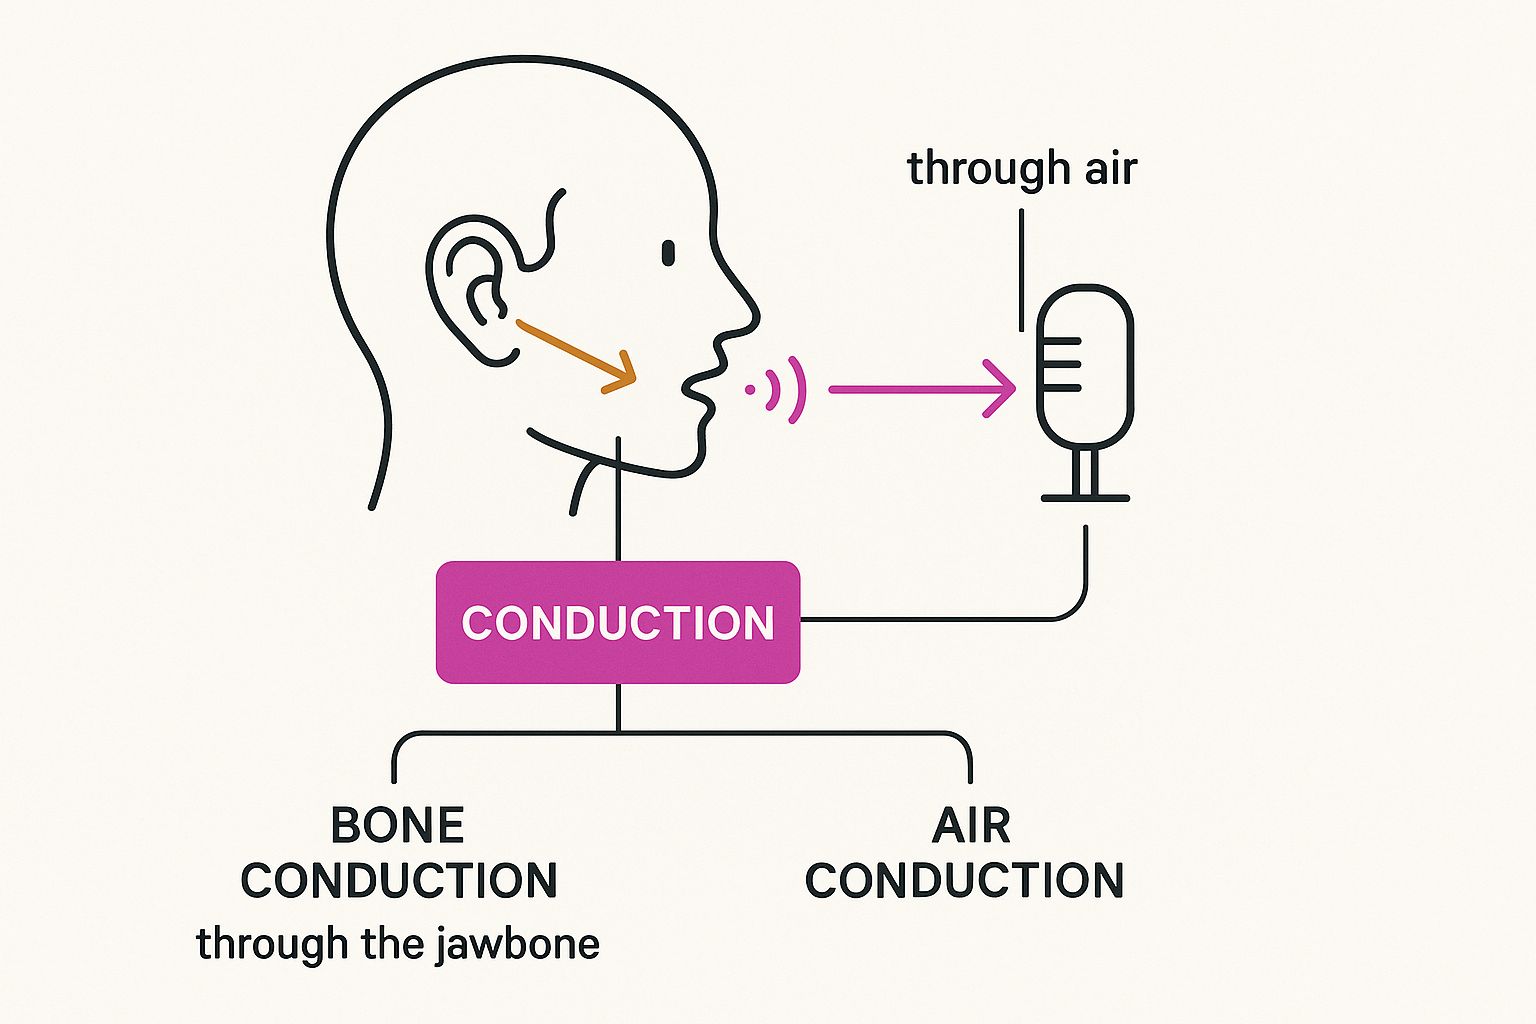
As you can see, a microphone is just an external ear. It only picks up the sound traveling through the air, completely missing out on that internal, bone-conducted warmth you're so accustomed to.
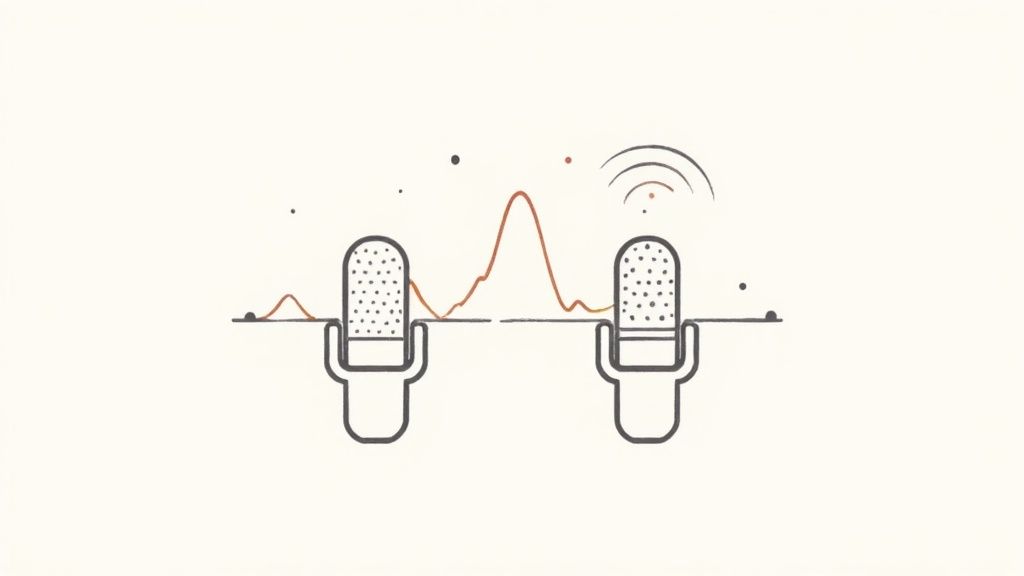
To give you a clearer picture, here's a simple breakdown of the differences.
This comparison highlights why that initial shock is so common. You're hearing your voice stripped of the personal, low-end enhancement you've heard your entire life.
Understanding this is the first real "aha!" moment in vocal production. It’s not that your voice is bad or your mic is broken (at least, not necessarily). The strangeness is just biology. Once you accept this, you can stop reacting emotionally and start listening objectively. Your recorded voice isn't some weird, alien thing—it's your true starting point, the raw clay you can shape and polish with the right techniques.
This isn't just you being overly critical. Our voice is tangled up in our identity. Your brain has spent your entire life hearing your voice through a combination of air and bone conduction, which adds a warmth and low-end richness that no one else hears. The recorded version—how the rest of the world actually hears you—is completely foreign.
That feeling of discomfort is a classic case of cognitive dissonance. Your brain is trying to reconcile two different versions of "you," and it instinctively rejects the unfamiliar one.
This is an incredibly common reaction. It's the same feeling you get looking at an old photo and thinking, "Did I really wear that?" Your recorded voice directly challenges how you see (or in this case, hear) yourself, triggering a knee-jerk reaction of dislike or embarrassment.
This isn't just a quirk; it's a well-documented piece of auditory psychology. It’s estimated that around 70% of people cringe when they hear their voice played back. The mismatch between what you expect and what you hear is often amplified by the self-consciousness of listening to a performance. You can find more details about the perception of voice quality in recent studies.
The key takeaway is that this feeling is a normal part of the process, not a sign that your voice is actually bad. Even professional singers and voice actors have to learn to manage this initial cringe factor.
Getting past this bias is one of the most important steps in learning to produce your own music. You have to train yourself to switch from being an emotional reactor to an objective listener.
Think of your recorded voice as raw material—like a lump of clay—not a personal judgment.
Here’s how you can start listening more objectively:
By treating your vocal recording like data, you can separate your emotional gut reaction from the technical reality of the track. This is what allows you to make effective mixing decisions based on what the song actually needs, not on how you feel about your own voice.
Alright, let's talk about the biggest culprit behind weird-sounding vocals. It’s not your talent, and it's probably not even your gear. It’s the room you're recording in.
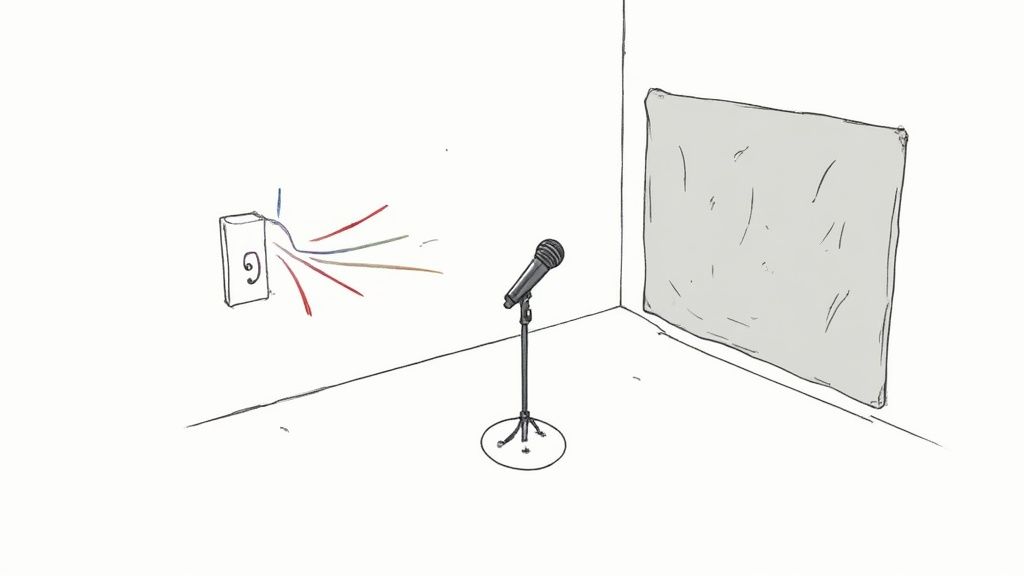
Think of your recording space as its own instrument. An untreated room is like a hall of mirrors for sound, creating a mess of reflections that distort your performance long before it ever hits the microphone.
Imagine trying to take a crystal-clear photo in a room where every wall is a mirror. No matter how great your camera is, the final shot will be a cluttered, confusing mess of reflections. That's exactly what your room is doing to your voice.
When you sing, sound waves shoot out in every direction. They smack into your walls, ceiling, floor, and desk, then bounce right back into the mic just milliseconds later. These tiny, rapid-fire echoes are called reflections, and they build up into what we call reverb. This is the #1 reason vocals sound amateurish—they get smeared with the boxy, hollow signature of the room itself.
Let’s be honest, most home recording setups are acoustic nightmares. They're usually square or rectangular rooms with parallel drywall surfaces and windows—a perfect recipe for creating sonic chaos. Your ears are incredible at filtering this stuff out in real-time, but your microphone? It captures everything.
This "room sound" creates a whole host of problems that are next to impossible to fix in the mix. You'll start to hear things like:
Here's a hard truth: The most expensive microphone in the world will sound terrible in a bad room. On the flip side, a budget-friendly mic can sound surprisingly professional in a space with even halfway-decent acoustics. The room always, always comes first.
You really don't need to drop thousands on professional acoustic panels to get a cleaner sound. The goal is simple: absorption. You just need to use soft, dense materials to soak up those sound reflections before they have a chance to bounce around.
Here’s a quick diagnostic table to help you identify what’s going wrong in your space and how to fix it without breaking the bank.
These are just starting points, but even one of these small changes can make a massive difference in the quality of your recordings.
Here are some more effective, zero-cost solutions you can try right now:
These simple moves can drastically cut down on unwanted room noise, making your vocals sound infinitely clearer and more direct. And if you're curious about how the pros do it, our guide to recording a song in a studio dives deeper into proper acoustic design.
By taking control of your recording environment, you’re taking the single biggest step toward fixing vocals that just sound... weird.
Once you've sorted out your room, the next thing everyone obsesses over is gear. And for good reason. While a terrible room will make even a $10,000 microphone sound bad, the right equipment is your partner in crime for getting a vocal that sounds professional, not just… off.
Think of your microphone less like a magic wand and more like a camera lens. A wide-angle lens gives you the big picture, while a macro lens zooms in on tiny, intricate details. Microphones are the same deal—each one is built to "hear" sound in its own unique way. That's why pairing the right mic to your voice is so critical.
You’re mainly going to run into two types of mics in the wild: dynamic and condenser. They look similar, but they couldn't be more different in how they work. Nailing this difference will save you a ton of headaches.
The mic you choose has to work with both your voice and your room. A super-sensitive condenser mic in an echoey bedroom will make your vocals sound weird and distant. On the flip side, a dynamic mic might make a quiet, gentle voice sound muffled.
Even with the perfect microphone, how you use it can make or break the recording. A couple of simple techniques can instantly fix some of the most common issues that make vocals sound amateurish.
First up is the proximity effect. This is just a fancy term for the way bass frequencies get boosted the closer you get to the mic. Sing right on top of it, and your voice will sound boomy and muddy. Stand too far back, and it'll sound thin and weak. The sweet spot is usually around 6-8 inches away. Start there and adjust to taste.
Second, and this is non-negotiable: use a pop filter. It’s that simple mesh screen you place between your mouth and the mic. It stops the big bursts of air from "p" and "b" sounds (plosives) from hitting the microphone and creating those awful, bassy thumps in your recording. It’s a cheap piece of gear that makes a massive difference.
You can dive deeper into finding the right equipment in our complete guide to the best microphones for home recording vocals.
It's also worth noting that sometimes the "weirdness" has nothing to do with your gear at all, but the technology delivering it. The global VoIP market, for example, is projected to hit $151 billion in 2024, but those systems heavily compress audio. This compression can strip out the natural character of a voice, leaving it sounding robotic and artificial. The 2025 Trends Report from Voices.com is a great read if you want to understand more about these tech impacts.
Getting a clean vocal recording is a massive win, but the mix is where so many otherwise great tracks just fall apart. How you process and seat that vocal in the song is every bit as critical as the performance itself. If your vocals sound weird even after you nailed the take, one of these common mixing mistakes is probably the culprit.
Think of it like framing a painting. You could have a masterpiece on your hands, but if you stick it in a cheap, ugly frame, that's all anyone will see. The same goes for mixing—bad decisions can make a stellar vocal performance sound amateurish, distant, or just plain wrong.
Compression is supposed to be your friend. It's the tool we use to gently even out a vocal's volume, bringing up the quiet parts and taming the loud ones so it sits consistently in the track. The problem starts when you get heavy-handed with it.
Over-compression is like putting a ceiling just a few inches above the singer's head. You completely lose the dynamic range—that natural rise and fall in volume that makes a performance feel human. What you're left with is a vocal that's loud, sure, but it's also flat, squashed, and lifeless. Every word has the same intensity, and all the emotion gets squeezed right out.
To get it right, think gentle. A good place to start is a 4:1 ratio with a slower attack and a quick release. Your goal should be just 3-6 dB of gain reduction, and only on the loudest peaks. This keeps the vocal under control without strangling the performance.
When a vocal sounds consistently loud but emotionally dead, over-compression is almost always the issue. The goal is control, not a chokehold. Let the vocal breathe.
This one is a classic. It’s so easy to fall into the trap of drenching a vocal in reverb or delay, thinking it'll make it sound "pro." These effects are meant to create a sense of space, but too much of a good thing turns your mix into a soupy, muddy mess. The vocal ends up sounding distant and washed out, buried under a thick blanket of artificial atmosphere.
It's a tell-tale sign of an inexperienced mixer. Instead of adding a professional sheen, it just makes the vocal feel totally disconnected from the instruments.
Here’s a much better way to go about it:
Equalization, or EQ, is all about shaping the tone of the vocal. But when you start making aggressive or uninformed moves, you can quickly make a vocal sound thin, harsh, or muddy. Boosting frequencies without a clear reason is a fast track to an unnatural sound. For example, cranking the high-end can introduce painful sibilance, while scooping out all the mid-range can leave the voice sounding hollow and weak.
Learning how to EQ a vocal properly is a non-negotiable skill. If you're fighting to get your vocals to sit right, our deep dive on how to EQ vocals for clarity and presence will give you the foundational knowledge you're missing. Smart, subtle EQ is the real secret to a professional-sounding track.
We’ve spent a good bit of time digging into why vocals can sound so… weird. From wonky room acoustics to all-too-common mixing blunders, there are plenty of traps.
So, let's pull it all together. This is your repeatable roadmap, a game plan you can use for every single recording session to get vocals that actually sound good. Think of it as your pre-flight checklist.
By running through these steps before you even hit record, you’ll sidestep most of the issues that make vocals sound amateur. It’s all about setting yourself up for a win from the very beginning.
Get this stuff right, and you've solved 90% of your potential vocal problems before you even sing a note. Seriously.
Once your room and gear are sorted, it's all about capturing a clean performance and then polishing it up in the mix without overdoing it.
The best vocal mix starts with a great recording. You can't polish a turd, as they say. Focus on getting it right at the source, and the rest becomes infinitely easier.
When you're setting your levels, watch your meters. You want the loudest parts of your vocal to peak around -10dB. This gives you plenty of headroom to work with and, most importantly, prevents nasty digital clipping that's impossible to fix.
And of course, the raw quality of your voice is a massive piece of the puzzle. If you're serious about improving your fundamental technique, it's worth checking out some of the best voice training app options to keep your skills sharp.
Follow this plan, and you’re not just guessing anymore. You’re building a solid foundation every time, tackling all the little things that make vocals sound off, and setting yourself up to create tracks that sound polished and professional.
If you've ever cringed hearing your own voice played back, you're not alone. Far from it. Let's tackle some of the biggest questions and worries that pop up when singers first start recording themselves.
Yep, it's an almost universal experience. The vast majority of people feel a little weirded out when they hear a recording of themselves speaking or singing. This isn't just in your head; it's physics.
When you speak or sing, you hear your voice through two paths: sound traveling through the air to your eardrums, and vibrations traveling through the bones of your skull. This combination of bone and air conduction gives your voice a depth and low-end richness that only you can hear. A microphone only picks up the air conduction part, which is why the recording always sounds thinner and higher-pitched than you expect.
Experienced pros get over this. They learn to treat the recording as an objective tool, a true representation of what everyone else hears, and use it to get better.
While you can't perfectly recreate the bone-conduction effect, you can absolutely use software to make the recording sound more familiar and pleasing to your own ears. The main thing you're missing is that bass and body you're used to.
The fix is pretty simple: grab an equalizer (EQ) plugin inside your recording software and give it a gentle boost in the low-mid range. A little bump somewhere around 100-250 Hz is usually the sweet spot. This brings back some of that warmth and fullness, making the playback feel much closer to what you hear in your head.
Nope, and it can actually make things worse. A really nice, high-end microphone is designed to be incredibly sensitive. It will pick up everything—including every last bit of echo and flaw in a room that hasn't been acoustically treated.
Honestly, a $1,000 microphone in a boxy, untreated bedroom is going to sound way worse than a simple $100 microphone set up in a walk-in closet packed with clothes. The clothes act as natural sound absorbers, giving you a much cleaner, more direct vocal take.
Think of it this way. Your priorities should be in this order:
Ready to make sure your final track sounds incredible in any environment? At CarMaster, we specialize in AI-powered mastering that's purpose-built to protect your music from sounding bad in the car, ensuring it translates perfectly everywhere else, too. Upload your track and get a free, instant preview at https://www.carmaster.io.

.png)