
To get vocals right with EQ, you have to follow one simple rule: clean up the junk before you try to boost the good stuff. It’s a two-step dance. First, you use subtractive EQ to carve out all the mud and harshness. Then, and only then, do you use additive EQ to gently bring out the clarity and presence that makes the vocal sit perfectly in the mix.
Before you even think about grabbing a knob on your EQ plugin, let's get one thing straight. Vocal EQ isn't just about making things louder or quieter. It's about surgically carving out a dedicated space for the vocal to live and breathe inside a crowded arrangement.
Think of yourself as a sonic sculptor. You’re chipping away at the unnecessary bits of stone to reveal the killer performance hidden underneath. The whole process really boils down to two main philosophies: cutting (subtractive) and boosting (additive). And trust me, the pros almost always start by cutting.
Starting with cuts isn't just a suggestion; it's a non-negotiable first step for me. When you remove the problem frequencies first, you end up with a vocal track that sounds cleaner and way more natural. If you jump straight to boosting, you’re just amplifying frequencies that are already fighting with guitars, synths, or drums, and that’s a fast track to a cluttered, amateur-sounding mix.
This initial "cleanup" phase is where you really train your ears to hear the common culprits. Every voice and every recording is different, of course, but there are some usual suspects that tend to hang out in the same neighborhoods:
The goal here is surgical removal, not a total sonic makeover. You're just trying to fix the specific things that are distracting from the performance. Let the natural character of the vocal shine through.
Learning to EQ vocals is less about memorizing specific numbers and more about building a mental map of the frequency spectrum in your head. It's about knowing what 200 Hz feels like versus what 3 kHz sounds like. This isn't some new-age concept; audio pros have been doing this since the early 20th century, back when EQ was first used to clean up radio broadcasts and film audio.
To get a solid handle on this, checking out some guides on general equalizer settings for music can give you a great starting point for how different instruments interact. This foundational knowledge is what allows you to make confident, musical choices that actually serve the song, instead of just slapping on presets and accidentally crushing the raw emotion in the performance.
Jumping right into EQ without any prep is a classic rookie mistake. It's like trying to paint a wall before you've cleaned off the dust and filled the holes—you’re just highlighting the problems that were already there.
The real secret to a polished, professional vocal sound is locked in the small, deliberate steps you take before you even open up an equalizer. This prep work isn't glamorous, but it’s what separates the amateurs from the pros. It ensures you’re enhancing a great performance, not just fighting against technical issues.
Our goal is simple: feed the EQ a clean, consistent, and healthy signal. If your vocal track is full of wild volume spikes, a nasty low-end hum, or digital distortion, your EQ moves will be less effective and might even make things sound worse. A few minutes of setup now will save you hours of headaches later.
First things first, we need to talk about levels. Gain staging is just a fancy term for managing the volume of your audio at every point in your signal chain, from the microphone preamp to the final plugin. Before you touch a single EQ band, you have to be sure your vocal track was recorded at a solid level and is free of any glaring problems. A clean source is always the best foundation.
The main enemy here is digital clipping. This is what happens when the audio signal is too loud for the system to handle, creating a harsh, crackly distortion that is nearly impossible to fix after the fact. If you want to get into the weeds on this, a guide on understanding audio clipping is a great resource.
As a practical rule of thumb, I always aim for my raw vocal tracks to peak around -12dBFS on the channel meter in my DAW. This gives you plenty of headroom to work with for all the processing that comes later and completely avoids any risk of clipping.
Once your levels are in a good place, the next job is to manage the vocal's dynamic range. Singers are human, not robots; their volume can swing from a delicate whisper to a full-throated belt in a matter of seconds. If you apply EQ to a track with those kinds of dramatic volume changes, your settings will inevitably be a compromise—sounding great on the loud parts but maybe too aggressive or weak on the quieter lines.
This is where a little bit of compression before the EQ works wonders. Now, the idea isn't to squash the life out of the performance. Far from it. We're just using a compressor to gently smooth out the biggest volume differences.
Think of this first compressor as a subtle, automatic volume rider. By lightly taming the loudest peaks, it creates a much more consistent signal for your EQ to work on. This makes every cut and boost more predictable and effective across the entire performance.
For this kind of gentle dynamic control, you don't need to get aggressive. Try starting with these settings:
This light touch prepares the vocal for surgical EQ, making sure your tonal decisions are based on the actual character of the voice, not its unpredictable volume. To see how these ideas fit into a bigger picture, our guide on human mixing explores how to apply this thinking across a full arrangement.
The real secret to a clean, pro-sounding vocal isn't about what you add; it's about what you take away. This is the whole idea behind subtractive equalization, and it’s where all good vocal mixes start. The goal here is to surgically remove problematic frequencies before you even think about boosting anything.
Honestly, this is the single most important step for creating clarity and helping a vocal sit perfectly in a busy mix. Think of it as your sonic cleanup crew. By carving out the mud, boxiness, and harshness that clutter up a raw recording, you reveal the true character of the performance hiding underneath.
Almost every single vocal EQ chain I build starts with a high-pass filter (HPF), sometimes called a low-cut filter. Its job is simple: get rid of all the useless low-end rumble that the human voice doesn't even produce.
This junk includes everything from microphone stand vibrations and air conditioner hum to vocal plosives—those low-frequency thumps from "p" and "b" sounds. These frequencies don't add anything musical, but they eat up a surprising amount of headroom in your mix, making it harder to get a loud, clean final master.
For most vocal tracks, you can safely set your high-pass filter somewhere between 80 Hz and 120 Hz.
The trick is to slide the filter up until you just start to hear the vocal thin out, then back it off a tiny bit.
Your goal is to remove the junk without touching the fundamental tone and body of the singer's voice. A well-placed HPF is an invisible fix that instantly cleans up the entire mix.
With the low-end rumble gone, it’s time to hunt down other problem spots. My go-to method for this is often called "sweep and destroy." It's a classic technique that helps you pinpoint and cut specific resonant frequencies that make a vocal sound muddy, boxy, or nasal.
Here’s how I do it:
This image shows a perfect example of this workflow in action, targeting those muddy low-mid frequencies.
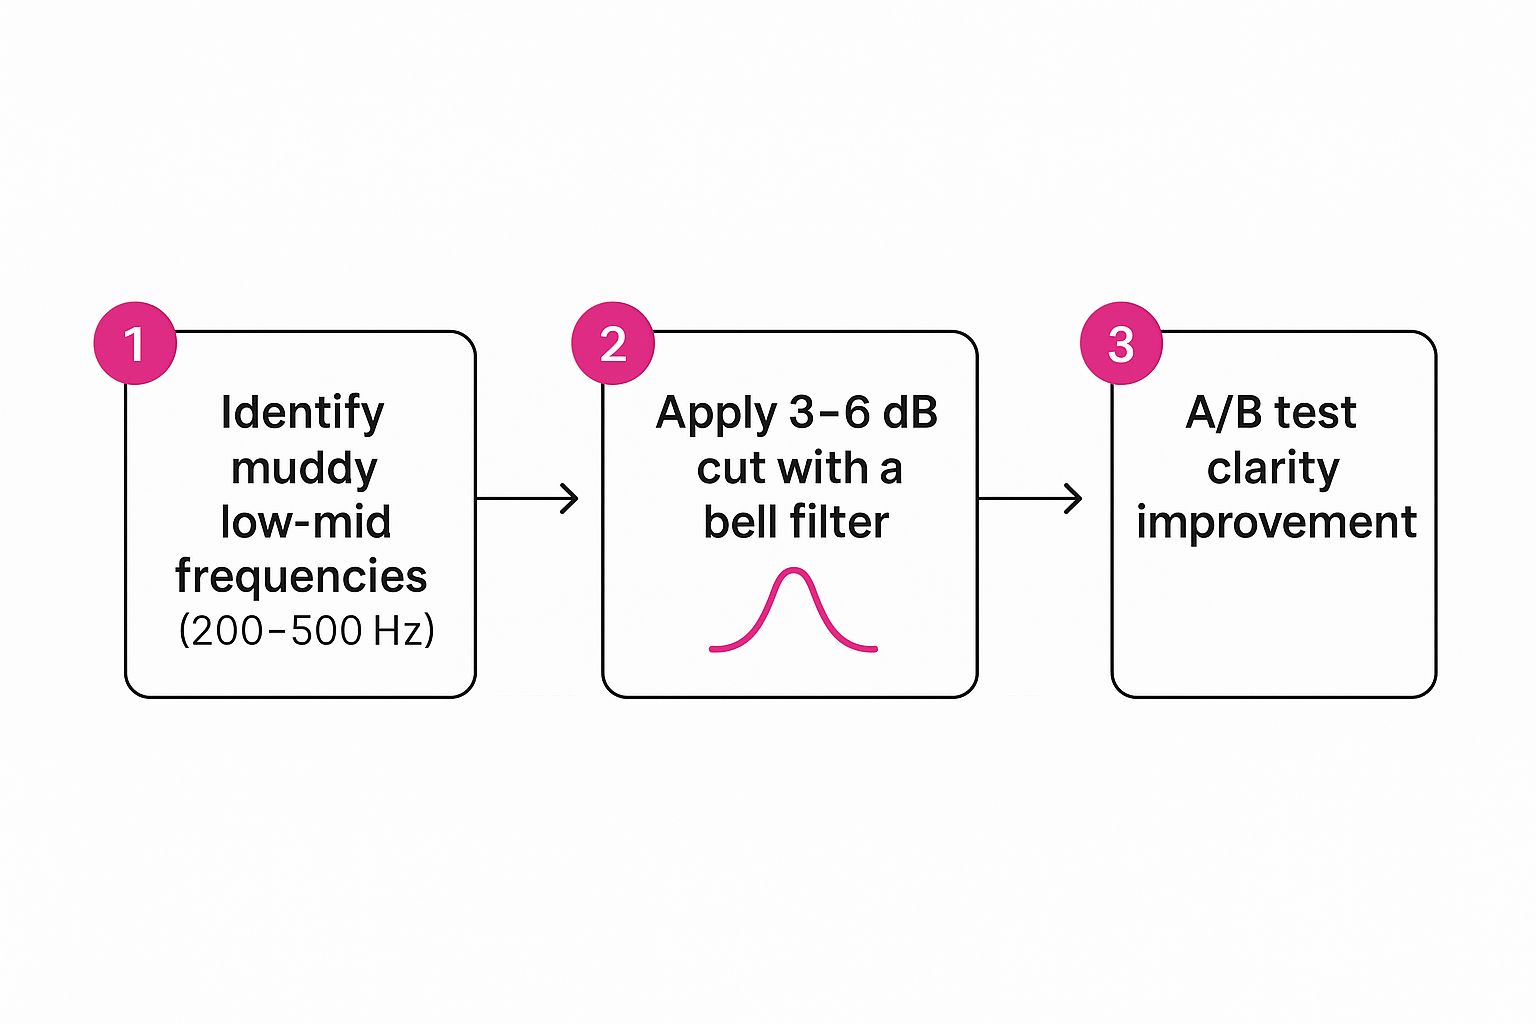
This focus on scooping out mud in the 200–500 Hz range has been a cornerstone of audio engineering for decades. It's part of a globally recognized approach to vocal shaping that emphasizes cuts in this region for clarity and taming sibilance above 8 kHz. If you're curious about the history, you can find more insights on the evolution of audio equalizers on Wikipedia.
Just be careful not to get carried away. Usually, two or three small, narrow cuts are all you need to dramatically clean up a vocal track. This subtractive process is the foundation you'll build everything else on.
Alright, you've done the clean-up work. The mud is gone, the nasty harshness is history, and the vocal track is already sounding a whole lot cleaner. Now for the fun part: additive EQ.
This is where we get to be artists, not just surgeons. We’re going to enhance the best parts of the vocal performance, dialing in the presence, clarity, and character that will make it slice right through the rest of the mix.
The name of the game here is subtlety. Unlike the sharp, aggressive cuts we used for cleaning, additive EQ is all about gentle boosts with wide, musical Q settings. We’re not trying to fundamentally change the vocal tone; think of it as nudging its best features into the spotlight.
The goal is for people to notice how great the vocal sounds, not how much EQ you used.
Is your vocal getting lost in the guitars and synths? Are the lyrics feeling a bit mumbled? The upper-midrange is the first place you need to look. This is the magic zone for clarity and presence.
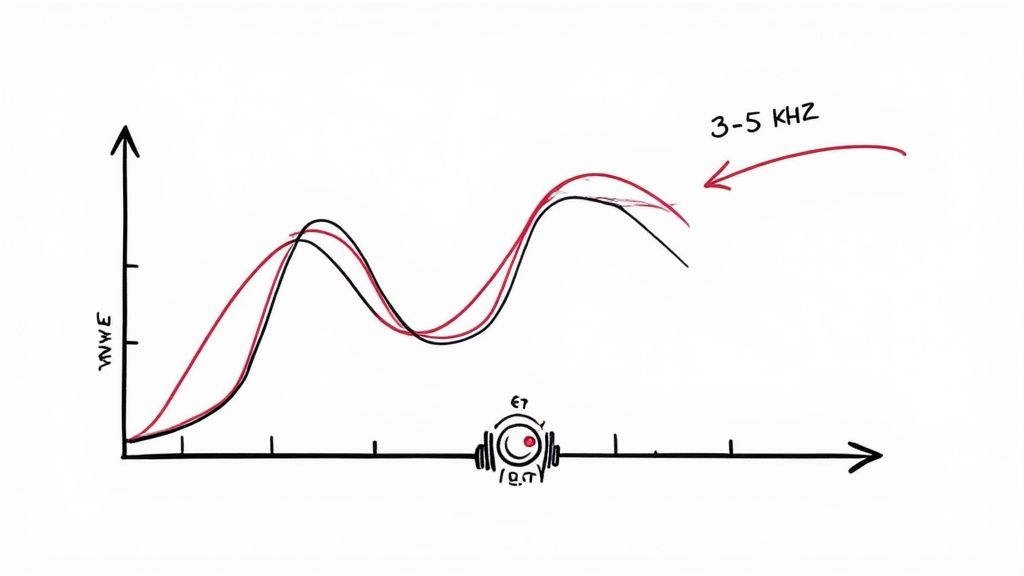
A gentle, wide boost somewhere in the 3-5 kHz range can honestly feel like a miracle worker. This frequency area is where the articulation and consonants of the human voice live. Boosting here pushes the vocal forward in the mix, making it feel closer and more immediate without you even touching the fader.
Start with a broad bell curve and try a small 1-2 dB boost. Sweep it slowly through that 3-5 kHz region until the vocal just snaps into focus. Easy does it, though. Pushing this area too hard is a fast track to a harsh, fatiguing sound that will have listeners reaching for the volume knob.
My go-to trick is to constantly A/B test the boost. Just click the EQ band on and off. When it's on, the vocal should sound clearer and more present. If it sounds obviously "EQ'd" or thin, you've gone too far.
Engineers have been shaping this critical range for decades. The original graphic equalizers from the 1950s gave them 6 to 7 bands to work with, allowing them to pinpoint and enhance vocal presence with incredible precision. You can actually read up on the history of these essential studio tools on Wikipedia.
Ever listen to a big-budget pop track and wonder how the vocals have that expensive, glossy shine? That sound is often called "air," and it's a classic trick that’s surprisingly easy to pull off with a high-shelf EQ.
This "air" band is way up there, usually anything above 10 kHz. You won't find much of the core vocal tone here, but you will find all the delicate, breathy textures that add a sense of dimension and polish.
Here’s how to get it:
This little lift can open up the entire top end, making a vocal sound instantly more professional. It’s one of those final touches that separates a good mix from a truly great one. If you want to get into even more advanced techniques, our guide on professional mixing secrets goes way deeper into achieving that radio-ready vocal sound.
One last thing to watch out for is sibilance. If boosting the air band makes the "s" and "t" sounds painfully sharp, you'll probably want to insert a de-esser before the EQ to tame them first. It’s all a balancing act between brilliant sparkle and silky smoothness.
Okay, once you’ve gotten comfortable with the basics of subtractive and additive EQ, it’s time to get into the fun stuff. Let's talk about the tools that pro engineers lean on to fix tricky problems and get that polished, modern vocal sound.
These techniques go way beyond just setting a static EQ curve and calling it a day. We're talking about EQ that can react and adapt to the vocal performance in real-time.
Think of it like this: your standard EQ is a photograph. It applies the same tonal shape to every single word, whether it needs it or not. The tools we're about to dive into are more like a video—they change moment by moment, only kicking in when a specific problem pops up.
This whole approach is a direct result of how far technology has come. Since the 1970s, digital EQs and pitch correction have completely changed the game for vocal production. As DAWs became the norm, engineers developed new tricks, like automated and dynamic EQs, that give us surgical control. You can actually read up on this evolution and see a brief history of pitch correction over at iZotope.com.
A dynamic EQ is an absolute game-changer for mixing vocals. Seriously. It’s a hybrid tool that smashes a compressor and an equalizer together. In plain English, an EQ band only turns on when its target frequency gets too loud and crosses a threshold you set.
It's the perfect fix for problems that are intermittent.
With a dynamic EQ, you're no longer forced to make a compromise. You don't have to thin out the entire vocal just to fix an issue that only happens 10% of the time. It's clean, transparent, and incredibly powerful.
Another killer tool in the modern mixing arsenal is mid-side (M/S) EQ. This technique splits a stereo signal into two separate parts: the "mid" (everything in the center, in mono) and the "sides" (all the stereo width information). The magic is that you can EQ each of these components on its own.
Now, your lead vocal is almost always mono, so where does this come in? Think backing vocals, vocal reverbs, and stereo delays. This is where M/S EQ shines.
For example, try putting a high-shelf boost on just the "sides" of your backing vocal group. This adds a beautiful sense of width and air to the harmonies without muddying up the center of the mix, which you need to keep clear for your lead. It’s a go-to trick for creating a huge, immersive vocal bed that still sounds clean and defined.
This kind of detailed control is what separates a good mix from a great one, especially when you're prepping tracks for that final polish. You can learn more about that last step in our guide to AI mastering with Stemmer.
Once you get the basics down, the real questions start popping up when you're in the middle of a mix. Let's walk through some of the most common hurdles I see people face. Getting these practical details right can make a huge difference.
This is easily one of the most frequent questions I get. While there aren't any hard-and-fast rules, there's a tried-and-true approach that works wonders.
Think of your EQ in two stages.
First, drop a subtractive EQ at the very top of your chain, right after setting your gain. The sole purpose of this EQ is cleanup duty—getting rid of low-end mud, rumble, and any nasty resonant frequencies that are poking out.
After that initial cleanup, you'll usually bring in your dynamics processing, like a compressor. Then, and this is the key part, place a second, additive EQ after the compressor. This lets you sweeten the tone of the already-compressed signal. If you boost frequencies before the compressor, it can react weirdly and clamp down on those boosts, which is usually not what you want.
We've all been there. You get a vocal track that was recorded in a less-than-ideal space, like an untreated bedroom, and it's got that tell-tale "boxy" sound or obvious room reverb baked right in.
While EQ can't perform miracles, it can definitely help.
This is the perfect time to use the "sweep and destroy" technique. You'll want to hunt for those specific frequencies where the room resonance is loudest—often lurking somewhere in the 300-600 Hz range—and use a narrow notch filter to pull them down. This kind of surgical cut can make a boxy vocal sound much more professional.
Just remember, EQ is a problem-solver, not a magic wand. The absolute best way to deal with a bad room sound is to treat the room before you even hit record.
Ah, the classic debate. The real answer is: both.
You absolutely should start by soloing the vocal track. This is the only way you'll clearly hear the little problems like low-end rumble, harsh sibilance, or weird room resonances. Do your subtractive cleanup here, where nothing else is getting in the way.
But when it comes to boosting—adding that presence and air—you have to do it with the full mix playing. A vocal that sounds amazing on its own can get completely buried the second the guitars and drums kick in. All your additive EQ moves are about helping the vocal sit perfectly in the mix, and you just can't judge that in isolation.
This balancing act is a huge reason why modern music production leans so heavily on digital tools. In fact, some industry data shows that over 85% of chart-topping songs use digital EQ and pitch correction to dial in that perfect sound. It’s become a standard part of the process, and you can dive into a brief history of pitch correction in music at iZotope.com to see just how it took over.
Ready to make sure your perfectly EQ'd vocals sound incredible everywhere? CarMaster is the only AI mastering service designed specifically to protect your mix from sounding bad in the car, ensuring your track translates perfectly from the studio to the real world. Get a free, instant preview and hear the difference for yourself at https://www.carmaster.io.

.png)