
If you think a magic plugin is the secret to professional vocals, I've got some bad news. The real magic happens way before you even touch an EQ. It's all about capturing a killer performance from the very start and then meticulously cleaning it up.
This all starts with the right mic and putting it in the right place, followed by piecing together the perfect performance from multiple takes. Nail this foundational stage, and you're already halfway to that radio-ready sound.
Before you get excited about compression or drenching your track in reverb, your one and only goal is to get the cleanest, most emotionally compelling vocal take you possibly can. The old saying "garbage in, garbage out" is the unbreakable law of audio. No amount of fancy processing can rescue a recording that's flawed at the source.
A truly polished vocal is built on a solid foundation, which I break down into three phases: recording, comping, and editing.
Your microphone is your absolute most important tool here. The decision between a dynamic and a condenser mic isn't just a technical one; it will fundamentally shape the character of your vocal track.
Mic placement is just as critical. A classic rookie mistake is sticking the mic right in front of the singer's mouth. You'll get slammed with plosives—those harsh pops from "p" and "b" sounds. Try this instead: position the mic slightly off-axis, maybe at nose level, pointing down toward their mouth. This one tiny adjustment can save you a world of headache later.
For a deeper dive, we've put together a whole guide on how to record vocals at home.
Pro-tip: The best mic for a vocalist often has the opposite character of their voice. A bright, crisp mic can bring life to a darker-sounding voice, while a warmer, smoother mic can tame one that's a bit shrill.
By the way, if you're working with video, many of the best video editing software options now have surprisingly powerful audio tools built right in that can handle this kind of vocal work.
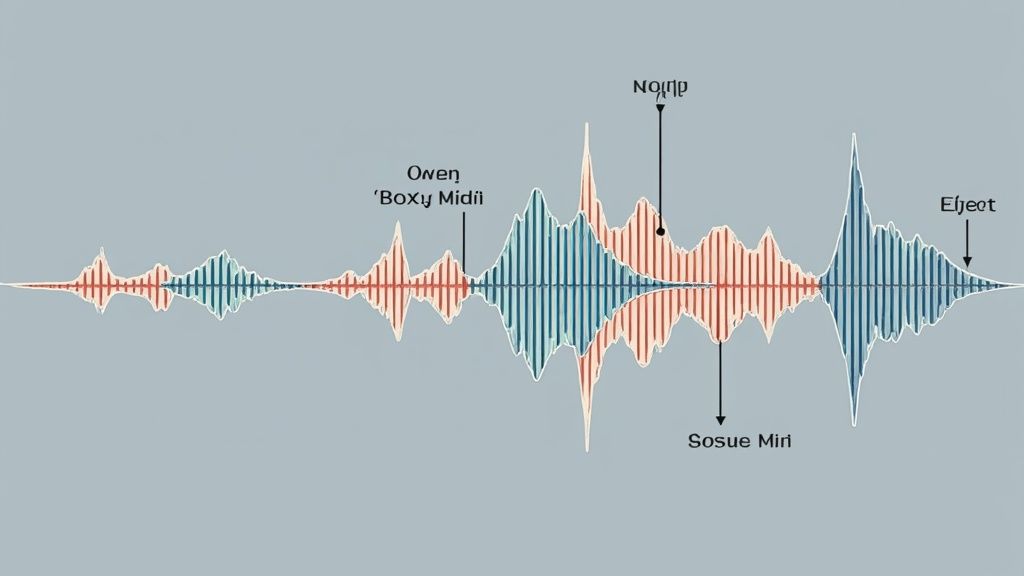
Alright, so you’ve got a bunch of takes recorded. Now comes the fun part: "comping." This is the process of stitching together one flawless "super-take" by picking the absolute best phrases, words, or even syllables from each recording. No, it's not cheating—it's how basically every professional record you've ever heard was made.
Listen through everything with a critical ear. You're hunting for the moments where the pitch, the timing, and the emotional delivery were absolutely perfect.
This visual shows the workflow I'm talking about, moving from that initial capture to a single, polished performance.

As you can see, you have to nail each stage before you even think about moving on to the next.
Your DAW almost certainly has features built specifically for this. They let you easily listen to different takes and promote the best bits up to a main track. The goal is to create a final version that sounds totally seamless, like the singer just walked in and nailed it in one go. Pay super close attention to the breaths and the timing between words at your edit points—that’s the key to making it all sound natural.
Equalization, or EQ, is the scalpel you'll use to carve out the perfect space for your vocal in the mix. Think of it less like a sledgehammer and more like a precision tool. I see so many producers immediately start boosting frequencies, but the real secret to a clean, professional sound is to first cut away what you don't need.
This is called subtractive EQ, and it’s all about cleanup. You’re basically hunting for problematic frequencies that make the vocal sound muddy, boxy, or harsh. By surgically removing these, you’ll find the vocal naturally sounds clearer and more present without you even touching the volume fader.
First things first, grab your favorite EQ plugin and start "sweeping" through the frequencies. This classic technique involves creating a narrow, high-gain boost and slowly dragging it across the frequency spectrum. You're listening for any spots that jump out as particularly ugly or resonant—those are your targets.
Common problem areas I'm always listening for include:
By removing the unnecessary clutter first, you create a clean canvas. This makes your later creative decisions—like adding warmth or air—far more effective and noticeable. Subtractive EQ is the janitorial work that makes the beautiful architecture visible.
Once you’ve cleaned up the track, you can finally switch your mindset to enhancing its best qualities. This is where additive EQ comes in, but the key is to be subtle. Trust me, small, wide boosts are almost always better than big, sharp ones.
Focus on these key areas to add that professional sheen:
EQ is a massive topic, and getting it right is a huge step toward pro-sounding vocals. For a much deeper dive into specific techniques, check out our complete guide on how to EQ vocals. At the end of the day, remember that your ears are your best tool—if it sounds good, it is good.
Once you’ve carved out space with EQ, it’s time to tackle the dynamics. This is where compression comes in, and it's arguably the most critical step for getting that pro vocal sound.
A singer’s performance is naturally dynamic. They might whisper a line, then belt out the next chorus. That creates a huge volume range that can get lost in a busy track. Compression is the tool that reigns all of that in, ensuring every single word is heard, felt, and sits perfectly in the mix.
Think of it like an invisible engineer riding the volume fader. It automatically turns down the loudest parts, creating a more consistent and controlled performance. This is how you get that upfront, in-your-face vocal that cuts through without ever feeling too loud.
The tools we're using for this are getting smarter, too. From 2021 to 2024, the use of AI in music tech shot up by about 15%. This has led to some incredibly intuitive plugins that can handle complex dynamic control and noise suppression with amazing results.
You can’t just slap a preset on and call it a day. To get compression right, you have to understand the main controls and dial them in for the specific vocal you’re working on.
The real art of vocal compression isn't to crush the life out of the performance. It’s about managing the energy so the listener stays hooked from the first word to the last. A great compressed vocal feels powerful and present, not flat and robotic.
Let's talk about real-world scenarios.
If you’re working on a gentle ballad or an acoustic track, you want transparency. Start with a low ratio, something like 2:1 or 3:1. Pair that with a slower attack to keep the delicate consonants intact and a medium release to smooth everything out. Here, you're just gently catching the loudest moments.
Now, flip the script. For a modern pop or rock vocal that needs to command attention, you'll need to be more aggressive. Try a higher ratio, maybe 4:1 or even 6:1, with a faster attack to really grab those transients and pin the vocal to the front of the mix.
Of course, these are just starting points. Every vocal is different. For a deeper dive into dialing things in, check out our complete guide on compression settings for vocals. The key is to always listen and adjust based on what the song needs.
Alright, you've got a clean, compressed, and balanced vocal track sitting in your project. It's technically perfect, but it probably sounds a little... sterile. A bit disconnected from the music. This is where the real fun begins.
Effects are the paint you use to bring that vocal to life. This is where you shift from being a technician to an artist, giving the vocal a unique personality and putting it in a believable space.

This creative stage is a massive part of what separates an amateur mix from a professional one. It’s no surprise the global market for vocal effects processors hit around USD 1.2 billion in 2024 and is expected to climb to USD 2.5 billion by 2033. Everyone from bedroom producers to pro engineers is looking for that magic touch. You can dig deeper into these vocal effects processor trends over on Accio.com.
Before we dive in, let's break down the essential tools you'll be using to add that professional polish.
This table covers the go-to effects for professional vocal production, explaining what they do and where they shine in a mix.
Each of these effects plays a crucial role in shaping the final vocal sound, turning a dry recording into an immersive and compelling performance. Now, let's get into how to apply them.
Before you even touch reverb or delay, think about adding a bit of saturation. This is my secret weapon for making digital recordings feel less digital.
Saturation mimics the pleasing sound of vintage analog gear—think old tapes or tube consoles. It adds subtle harmonics that make a vocal feel richer, warmer, and more present. It’s the kind of character and grit that EQ just can't replicate.
Treat it like adding spice to a meal. A little goes a long way. Pull up a tape or tube saturation plugin and just nudge the drive up until you hear the vocal get a bit more body and a slight edge. You're not looking for obvious distortion, just a little bit of analog love.
Reverb is what gives your vocal a sense of place. Without it, a vocal can sound like it's floating in a void, completely separate from the band. The type of reverb you pick has a huge impact on the track's entire vibe.
Pro-Tip: Never, ever put reverb directly on your vocal channel. Always send your vocal to a separate aux/bus track and put the reverb plugin there. This gives you way more control, letting you EQ the reverb itself and blend it in just right.
If reverb creates space, delay creates rhythm and texture. It's an echo effect you can use to add some cool rhythmic bounce or just some subtle depth.
A classic trick I love is the slapback delay—a single, super-quick echo with zero feedback. It’s all over early rock and roll records and it’s amazing for adding attitude and thickness without cluttering things up.
For more modern pop tracks, try a rhythmic delay timed to the beat, like an eighth-note or quarter-note echo. The key is to use automation to turn it up only at the end of phrases. That way, it fills the gaps without ever stepping on the lead vocal.
Getting the EQ, compression, and effects right gets you about 90% of the way there. Most people stop here.
But that last 10%—the really meticulous, detailed work—is what separates a pro-level vocal from a decent demo. This is where automation comes in, turning a good vocal performance into something that feels alive and breathes with the track.
This is the secret sauce. It’s what makes every single word feel intentional and keeps the listener hooked from the first line to the last.
First things first, before we touch any faders, we need to deal with sibilance. These are those piercing "s," "sh," and "t" sounds that can feel like an ice pick to the ear, especially after you've brightened the vocal with EQ and slammed it with compression.
The tool for this job is a de-esser.
Think of a de-esser as a hyper-specific compressor. It clamps down on a very narrow slice of frequencies—usually somewhere between 5-8 kHz—but only when a harsh sibilant sound pops up. Your goal is to smooth out these sharp edges without giving the singer a lisp.
Go easy on the settings. A de-esser that's working too hard sounds incredibly unnatural. You want to set the threshold just high enough to catch only the most offensive "s" sounds while leaving everything else alone.
A rookie mistake I see all the time is trying to fix sibilance by just carving out those frequencies with a static EQ. Don't do it. You'll make the entire vocal sound dull. A de-esser is the right move because it’s dynamic—it only works when needed, preserving that crucial brightness and air for the other 99% of the performance.
Automation is simply drawing in changes to different parameters over time. It’s how you, the mixer, become part of the performance. This is where you make the vocal feel dynamic and ensure every syllable has the perfect impact.
Volume is the big one. Even with a great compressor, some words will inevitably get buried while others jump out too much. By manually riding the volume fader, you can perform micro-adjustments that make a huge difference:
This level of detail is a hallmark of modern vocal production. Today's tracks put the vocal front and center, often letting it own the critical midrange frequencies. As you can see from professional audio market trends, the push is toward more dynamic and emotionally connected vocal experiences, especially with the rise of immersive audio.
And don't stop at volume. You can automate almost anything. Try automating the send to your delay so that an echo blossoms only on the last word of a chorus. Or maybe automate an EQ to add a touch more "air" just during the hook. This is the fine-tuning that takes a vocal from good to unforgettable.
Even when you follow a solid workflow, some questions always seem to pop up. It happens to everyone. Let's tackle some of the most common hurdles I see producers and artists run into. Getting these sorted is what separates a good vocal from a truly professional one.
Here are the questions I get asked constantly, along with my straight-to-the-point answers.
This is the classic mixing dilemma, and the answer isn't just "turn it up." You have to create a dedicated space for the vocal to live.
Your focus should be squarely on the midrange frequencies. I usually find that a strategic, broad boost somewhere in the 1-3 kHz range is the magic ticket. It pushes the vocal forward, making it present and clear without sounding harsh, so every word is understood.
Another trick I lean on is sidechain compression. Trigger a compressor on competing instruments—like synth pads or rhythm guitars—with the vocal track. This subtly ducks their volume whenever the vocalist sings, automatically carving out that space you need. A final touch of saturation can also add some harmonics that help the vocal slice through everything else.
Your plugin sequence, or "vocal chain," makes a huge difference. While there's always room to get creative, sticking to a proven order gives you consistent, predictable results every time. It just works.
A reliable vocal chain usually looks something like this:
This one’s easy: almost always, a hard no. Always record your vocals "dry," which means completely free of effects like reverb, compression, or delay.
Recording with effects permanently "prints" them onto the audio file. If you decide later that the reverb is too long or the compression is too aggressive, you're stuck. It’s impossible to undo, forcing you to re-record the part entirely.
The only real exception is if you're giving the singer a little reverb in their headphones to help them feel more comfortable during the performance. Just make absolutely sure that the effected signal isn't actually being recorded into your DAW.
It's also worth noting that as tools like an AI Voice Generator for YouTube become more common, applying these same production techniques to synthetic vocals is becoming just as essential for a polished final product.
Ready to ensure your final mix translates perfectly to the most common listening environment? CarMaster is the only AI mastering service specifically designed to make your music sound incredible in the car. Protect your song from phase issues and muddy bass by getting a free, instant preview at https://www.carmaster.io.

.png)