
Ever wonder what separates a raw, shaky vocal from a polished, radio-ready performance? The secret is almost always masterful compression. Getting your compression settings for vocals right isn't just a technical fix; it's a creative tool that can add serious emotional weight and make sure every last syllable cuts through the mix.

Think of a compressor as a super-fast, automatic volume knob. Its job is to turn down the loudest parts of a performance and bring up the quietest ones, creating a much more consistent and controlled sound. This isn't about squashing the life out of the vocal or making it sound fake. It’s about getting it to sit perfectly in a busy track.
Without it, a singer’s powerful chorus might totally steamroll the other instruments, while their softer, more intimate verses get completely lost. That wild dynamic swing is one of the biggest giveaways of an amateur recording. If you want professional results, you have to get a handle on vocal compression.
But here's the thing: effective compression does way more than just manage levels. It actually shapes the character and emotional impact of the vocal. By tweaking how quickly the compressor reacts, you can emphasize the punch of an aggressive rap verse or soften the delivery of a heartfelt ballad.
I’ve worked with singers who go from a whisper to a full-on shout in the same line. Taming that kind of dynamic range requires careful compression to keep the intimate moments close without letting the loud parts get harsh and painful. That control is what gives you a cohesive, "glued-together" sound that feels intentional and polished.
Ultimately, good vocal compression really boils down to three key jobs:
Now that we've covered the "why" behind turning all those knobs, let's get into the practical side of things.
Alright, let's get our hands dirty with the compressor's controls. This is where you actually start sculpting your vocal sound. Forget thinking about it like a complex science experiment—it's more like working with clay. Tiny moves can make a huge difference.
The main dials you'll be grabbing are Threshold, Ratio, Attack, and Release. These are the big four, and they control how, when, and how hard the compressor actually works on your vocal. If you need a refresher on the basics, our guide on what compression does in music is a great place to start.
These controls are on pretty much every compressor out there, from the free plugin that came with your DAW to a vintage hardware unit that costs a fortune. Let's break down what they're actually doing.
Taming vocal dynamics is nothing new. Back in the late 1950s, studios fell in love with units like the Universal Audio 175B and 176, which were groundbreaking for having variable attack and release. Engineers quickly found that ratios between 2:1 and 4:1 were the sweet spot for vocals—and guess what? Those numbers are still our go-to starting points today. You can get the full story by checking out the history of compressor limiters to see how we got here.
Beyond the main four, you'll often see a couple of other controls that give you an extra layer of finesse for dialing in the perfect vocal compression.
Knee changes how the compression kicks in. A "hard knee" is abrupt, like an on/off switch. But a "soft knee" eases into the compression more gradually as the signal gets close to the threshold. For vocals, a soft knee is almost always the more musical choice.
Makeup Gain is simply a volume knob for after the compression happens. Since compression's main job is turning down the loudest parts, the overall vocal track will be quieter. Makeup gain lets you bring that overall level back up, making the vocal feel louder and more present in the mix.
Here's a pro tip: Don't get fooled by loudness. When you're setting your compression, constantly use the makeup gain to match the volume of the compressed signal with the bypassed (uncompressed) signal. This is called gain-staging, and it ensures you're actually hearing the effect of the compression, not just a simple volume boost.
To get you started, here's a quick reference table with some solid starting points for different genres. Don't take these as gospel—every vocal is different—but they'll get you in the ballpark.
Use this table as your launchpad, then trust your ears to make the final tweaks. Happy compressing
Knowing what the knobs do is one thing, but knowing how to use them together is what separates the pros from the amateurs. The key to consistent, professional-sounding vocals isn't random knob-twisting; it's having a repeatable workflow. Let's walk through a process that just plain works, no matter the singer or the genre.
But before you even think about reaching for a compressor, you have to start with a clean signal. No amount of compression can save a bad recording. A crucial first step is making sure you have a high-quality vocal take, which all starts with applying proper microphone techniques.
First things first, find the loudest, most energetic part of the vocal performance and loop it. This is usually the chorus. Why start here? Because this is where your compressor is going to be working its hardest. If you dial in your settings on a quiet verse, you're almost guaranteed to squash the life out of the vocal when the chorus kicks in.
Now, start pulling the threshold down until you see the gain reduction meter consistently kicking in on the loudest peaks. For most pop, rock, or R&B tracks, a good target to aim for is around 3-6 dB of gain reduction. This is the sweet spot—you get control without completely killing the natural dynamics.
This visual guide gives you a quick look at how these initial steps flow together.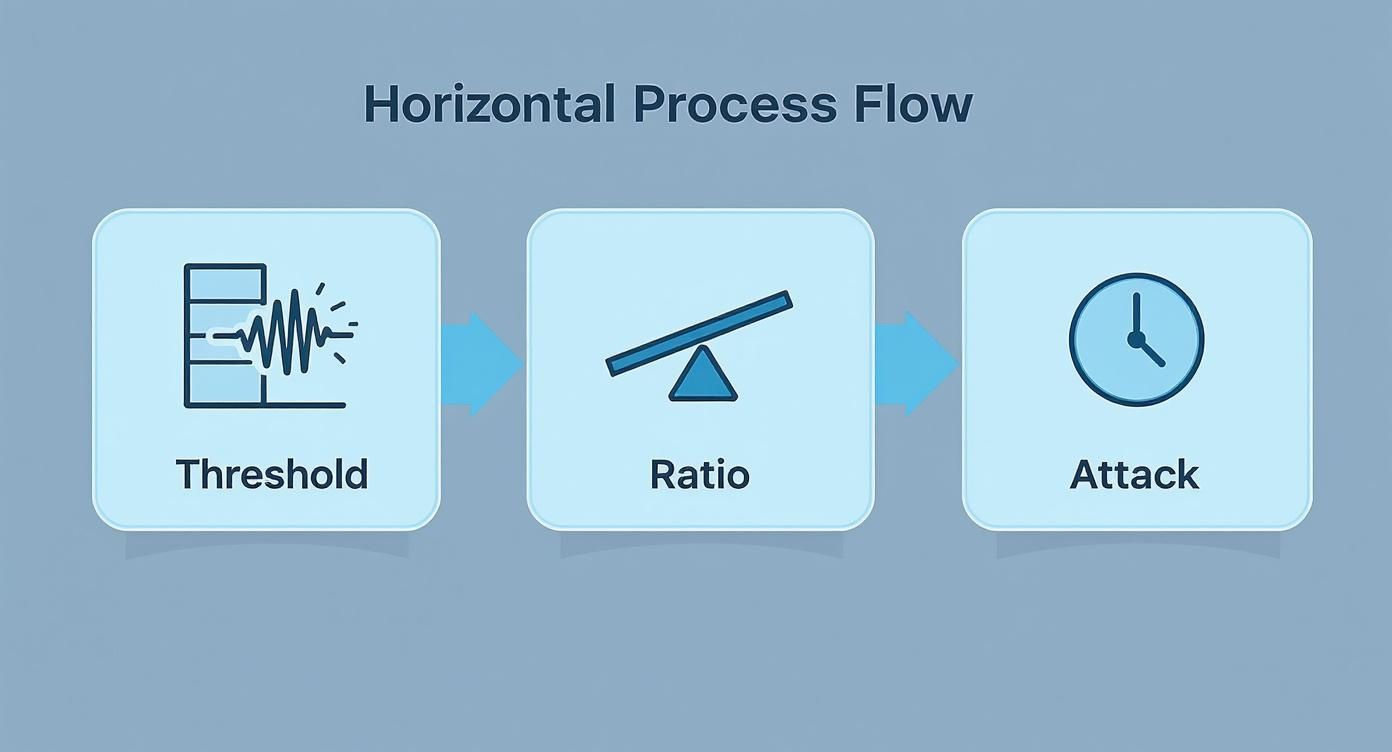
You can see how it's all about finding that trigger point (threshold), then deciding how hard to squeeze (ratio) and how fast to react (attack).
Once the threshold is set, it's time to shape the compressor's personality with the attack and release controls. Honestly, this is where the real magic happens.
Here's a tip I can't stress enough: A/B test constantly. Keep bypassing the compressor to make sure what you're doing is actually an improvement. Use the makeup gain to match the loudness of the compressed and uncompressed signals, otherwise, you'll just be tricked into thinking louder is better.
Finally, always check your work in the context of the full mix. A compressor setting that sounds incredible in solo might completely disappear—or stick out like a sore thumb—once all the other instruments are playing.
Getting vocals to sit perfectly is an art in itself. For a much deeper dive, check out our complete guide on how to mix vocals to learn some more advanced strategies.
Okay, once you've gotten the hang of a single compressor, it's time to get into the really cool stuff. These are the techniques the pros use to get those polished, radio-ready vocal sounds that just sit perfectly in a track. We're moving beyond just slapping on one plugin and calling it a day.
One of my absolute go-to strategies is serial compression. This just means using two (or sometimes more) compressors back-to-back. The goal isn't to obliterate the vocal with gain reduction; it's actually the opposite. By having each compressor do just a little bit of work, you get a sound that's way smoother and more transparent than what you'd get from pushing one compressor to its limits.
You can't talk about serial compression without mentioning this classic combo. It's a pairing you'll find in almost every major studio for a reason: it just works. You run a fast, punchy FET compressor like an 1176 into a slow, smooth optical compressor like an LA-2A.
You get the best of both worlds here—tight dynamic control from the first stage and a polished, musical feel from the second.
A good starting point is to have each compressor knocking off just 2-3 dB of gain reduction. This way, neither one is breaking a sweat, and you avoid those nasty artifacts that scream "over-compressed!" The vocal ends up sounding incredibly controlled, but still feels alive and natural.
Here's another trick you absolutely need in your toolkit: parallel compression (sometimes called "New York compression"). The concept is simple but powerful. You mix a heavily, sometimes brutally, compressed version of your vocal in with the original, dry signal.
This technique is less about control and more about adding vibe. It beefs up the vocal, brings out all the subtle, low-level details, and adds a sense of power and excitement without killing the natural dynamics of the original take. Your vocal will feel bigger and more present in the mix.
These ideas aren't new, either. The whole concept of taming peaks goes back to early broadcast engineers who used limiters to keep their signals from distorting, often aiming for 3–6 dB of reduction. By the late 20th century, it was estimated that around 70% of pro vocal recordings had some form of peak limiting. You can read more about the fascinating history of audio processing on thebdr.net.
Of course, none of these advanced techniques will work well if you're compressing a muddy or harsh signal. That's why getting your EQ right is the critical first step. Make sure you check out our guide on how to EQ vocals to build a solid foundation.
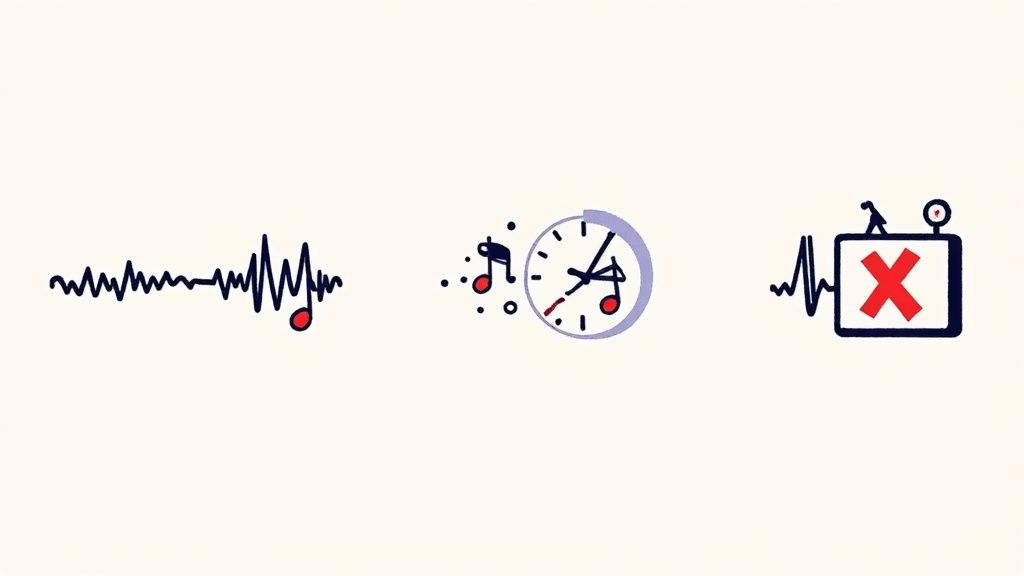
We’ve all been there. You apply a little too much squeeze and suddenly a passionate, dynamic vocal performance sounds flat, lifeless, and stuck in one place. Spotting these common traps is the first step to getting consistently great compression settings for vocals.
The biggest and most frequent mistake? Just plain over-compression. When you glance over and see your gain reduction meter pinned at -10dB or more, you're not controlling dynamics—you're crushing the life out of the performance. The simple fix is to back off, or better yet, try serial compression where two or more compressors each do a tiny bit of work.
This is another classic one. You set your attack and release times in a way that actively fights against the vocal's natural rhythm. A super-fast attack can chop the front end off of consonants, making lyrics lose their clarity. On the flip side, a release that’s too slow will keep the compressor clamped down, creating an unnatural "pumping" sound as it struggles to reset before the next word.
Listen closely to the phrasing and you'll hear it:
Your goal is musicality, not technical perfection. Always trust your ears more than the meter. A great compressor setting should feel like it's breathing right along with the singer.
Finally, never try to compress a messy signal. If you apply compression before you’ve handled sibilance or tamed harsh frequencies, you're just going to make those problems louder and more painful.
Always remember: clean up first. Place your corrective tools—like your EQs and de-essers—before the compressor in your signal chain. A clean signal going in is the key to a great sound coming out.
Alright, let's clear up some of the questions I get all the time about dialing in vocal compression. These are the hurdles that trip people up the most.
First up: where the heck does the compressor even go in your vocal chain?
It's a great question, and the answer depends on what you're trying to do. If your goal is cleanup and control, you’ll want to place the compressor after your surgical, corrective EQ and your de-esser. Clean up the junk first, then control the dynamics.
But what if you're going for a specific vibe or color? Sometimes, putting a compressor before your EQ can sound amazing, pushing the signal into the EQ in a really musical way. Just make sure the signal is reasonably clean before it hits that first compressor.
This is where the real fun begins, because different compressors have totally different personalities. You'll want to pick the right tool for the job.
This is the classic debate, and my take is simple: do a little bit of both.
When you're tracking, adding just a touch of light compression is a smart move. I'm talking barely kissing the needle—just 1-2 dB of gain reduction on the loudest peaks. This tames the wildest parts of the performance and gives you a much healthier, more consistent signal to work with later.
Then, when you get to the mixing stage, you can bring in your main compressors to do the heavy lifting and creative shaping. You get the best of both worlds: a great recording and total flexibility in the mix.
My advice? Track with a touch of compression to tame the peaks, then apply your main creative compression during the mix. It gives you a solid foundation without painting you into a corner.
Even with perfect vocal compression, a track can fall apart in the car. CarMaster is built specifically to make sure your mixes translate perfectly to automotive sound systems. You can upload your track for a free preview and hear exactly how your vocals will hit on the road.
Get your song mastered for the car at carmaster.io and stop guessing.

.png)