
When a mix sounds like it’s trapped behind a heavy blanket, it usually boils down to three culprits: frequency masking, over-compression, and a cramped stereo image. If you can clear out the mud between 200–500 Hz, give your transients room to breathe, and widen the soundstage, you’ll instantly bring back the clarity and punch your track deserves.
Before you start twisting knobs and pulling faders, it helps to diagnose exactly what’s robbing your mix of its definition. Pinpointing the root cause makes the fix so much more effective.
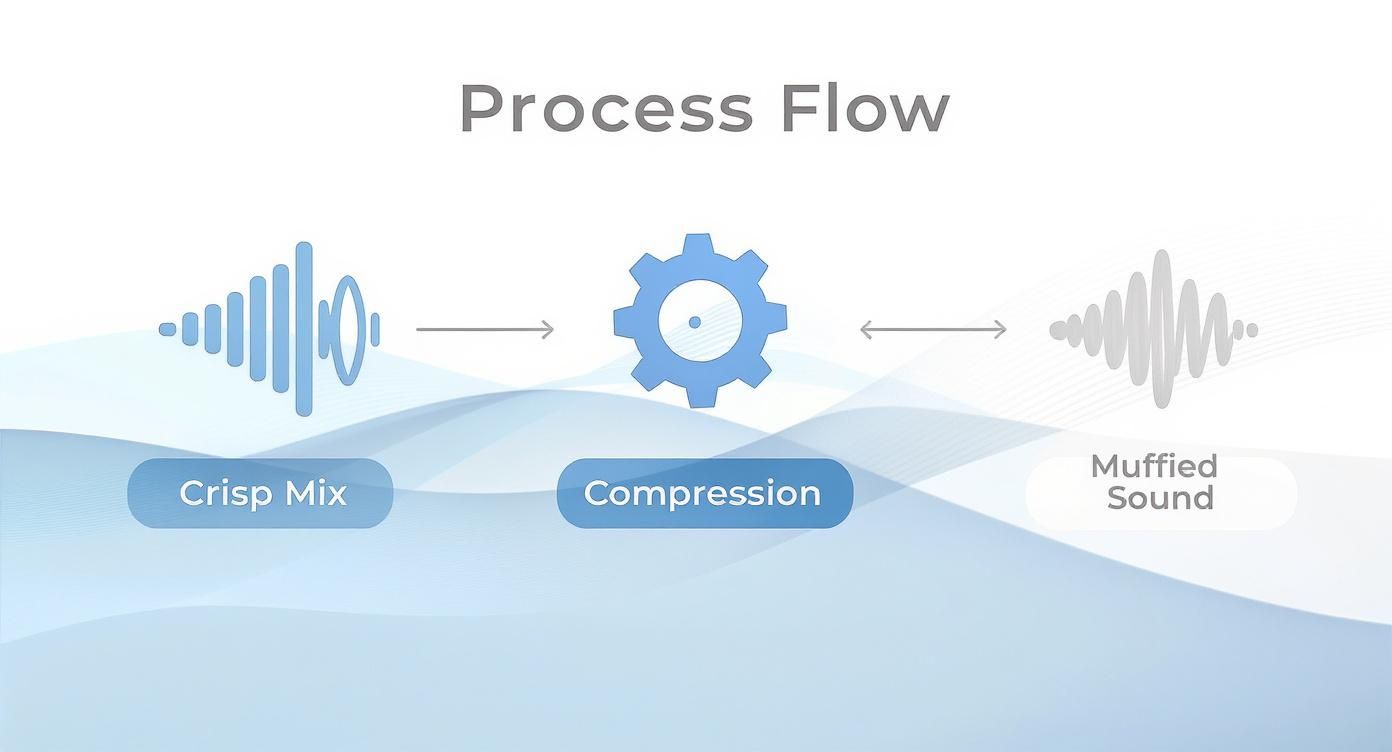
Let's break down the usual suspects. This table is a quick cheat sheet for figuring out what's going wrong when your mix lacks that professional shine.
Once you know what you're listening for, you can start applying targeted solutions instead of just guessing.

Frequency masking is a classic offender, especially in the low-mids. This is where the kick, bass, and the body of guitars and synths all fight for the same sonic real estate. Making surgical cuts in that 200–500 Hz range is often all it takes to let each element speak clearly.
Compression is another double-edged sword. It's essential for glue and control, but setting the attack and release too fast can completely kill the life of a track. You need to let that initial punch—the transient—poke through before the compressor clamps down.
"Squash transients too hard and your mix goes from alive to stifled in an instant."
Finally, a narrow stereo image forces everything into a crowded center lane. Think of it like a traffic jam. By panning elements like guitars, keys, and backing vocals out to the sides, you create space and open up the entire mix.
Got a muffled mix? Try these quick fixes I turn to all the time:
Getting these fundamentals right before the mastering stage is crucial. That way, your final polish from a tool like CarMaster is enhancing an already great mix, not trying to fix a broken one.
"A clear foundation makes fixes faster and results more transparent."
Next up, we’ll dive into the specific EQ moves, compression tactics, and stereo widening workflows that will banish that muffled sound for good.
Ever notice how your mix sounds punchy and crisp in the studio, but falls flat on Spotify? One of the biggest culprits isn't your mix at all—it's the file format. That perfect, high-resolution WAV file you bounce goes through a pretty aggressive transformation before anyone actually hears it.
Streaming services and MP3s rely on digital audio compression. To shrink file sizes for easy streaming, this process has to throw out some of the audio data. And what's the first thing to go? Usually, the highest frequencies. That's exactly where the "air" and shimmer in your vocals, synths, and cymbals live. When that information gets stripped away, a bright mix can suddenly feel dull and boxed-in.
It’s not just about losing a bit of top-end sparkle; the whole vibe of your track can change. Think of it like a low-res photo. You can see the main subject, sure, but all the fine details that make it feel real and deep are gone. It's the same with low-bitrate audio—you're losing the subtle sonic details that give your mix a sense of space and clarity.
This is why a song can sound muffled after it's been compressed. MP3 encoding often lops off everything above 16 kHz or 18 kHz. Research has even shown that at bitrates under 320 kbps, there's a serious loss of clarity. A study on iddblog.org even suggests that listening to heavily compressed audio for too long can actually degrade our cognitive listening skills. Ouch.
The bottom line is this: your mix has to be tough enough to survive the compression gauntlet. Don't just mix for your studio monitors. You have to mix for the real world, where your music is going to get squeezed, streamed, and blasted through car speakers.
This means you need to be aware of what happens after your track leaves your DAW.
Getting a feel for how your music translates is the secret sauce. It helps you make smarter mixing decisions that ensure your track still hits hard, whether it’s coming out of high-end headphones or a cheap Bluetooth speaker.
When a mix sounds muffled, our first instinct is often to boost the high frequencies—add more sparkle, right? But most of the time, the real problem isn't what's missing, but what's in the way. The best tool for the job is often an equalizer, but the secret is to cut, not boost. This is the core idea behind subtractive EQ.
Think of your mix as a cluttered room. Before you bring in that cool new synth or a killer vocal take, you have to clear out some of the junk that’s taking up space. In audio, that "junk" often piles up in the notorious 200-500 Hz range. This is where you find the body of bass guitars, synths, and even some heavier vocals, and when they all fight for the same space, you get mud.
By carving out small pockets here and there, you let the important parts of your track breathe and really shine through. It's a game-changer.
This is exactly how a mix can go from crisp and clear to a muffled mess if you don't keep those frequencies in check.
As you can see, what starts as a solid mix can get clouded pretty quickly when frequency buildup isn't managed.
A high-pass filter (HPF) is your best friend here. It's a simple tool that cuts out all frequencies below a certain point, and it’s unbelievably effective for cleaning up tracks that don’t actually need all that low-end information.
You can apply a gentle HPF to elements like:
"A small, surgical cut on one instrument can make another feel twice as loud. It's about creating relationships, not just turning things up."
This isn’t just about cleaning up obvious rumble, either. There's real science to it. While being too aggressive with a high-pass filter can sound unnatural, research shows that sound quality drops off a cliff when you start cutting into necessary frequencies above 200 Hz. This just confirms how critical careful low-end management is for overall clarity.
By targeting and removing unnecessary low-end, you’re taking one of the fastest and most effective steps toward fixing a muffled mix and bringing back that much-needed definition.
Compression often gets a bad rap for squashing the life out of a mix, but when used correctly, it’s the secret to making every hit and pluck shine through with clarity.
If your song feels muffled or buried, chances are the transients are being squeezed too hard. This happens all the time. A fast attack time clamps down on the initial hit of a drum, hiding it in the mix. Combine that with a sloppy release, and you've got a recipe for a dull, lifeless track.
We can fix this, and one of my favorite techniques is parallel compression. It adds serious weight without completely flattening your dynamics.
Think of it as blending a heavily compressed version of a track right alongside the original, dry signal. You get the fullness and power from the compressed signal, but you keep the air and natural feel of the original.
For drums, try a 50/50 wet/dry split. You’ll be amazed at how much punch comes rushing back into the mix. Vocals and guitars usually need a lighter touch—I often find myself landing around 30% wet for those elements.
It's not just about blending; the settings on your compressor are everything. Getting the attack and release just right is where the magic happens.
Start with your attack time around 10 ms. This gives the initial snap of the drum or pluck of a string enough room to breathe before the compression kicks in. For the release, aim for something between 50 ms and 100 ms. This range usually feels the most natural, letting the sound decay without any weird pumping artifacts.
A while back, I was in the studio A/B testing a snare track. One version had a super-fast attack, the other a slightly slower one. The slower attack completely opened up the soundstage and added a real sense of depth. When I tested it in the car later, that's the version that translated perfectly.
When a mix loses that initial snap, the whole groove just feels sluggish. On one of my latest projects, dialing the attack back by just 3 ms was enough to revive a drum loop that had fallen flat. It's often the smallest tweaks that make the biggest difference.
Parallel compression is like having both raw power and surgical finesse in a single move. It’s a total game-changer for punchy mixes.
To dive deeper into the nuts and bolts of what compressors do, check out our guide: What Compression Does in Music.
Mastering your track with these compression dynamics in mind ensures it will cut through on any playback system, from earbuds to a full car stereo, without losing its essential character.
 When a song feels muffled, it often sounds like every instrument is crammed into a tiny box, shouting from the exact same spot. A crowded mix is a muddy mix, plain and simple.
One of the best ways to fix this is by creating a wide, defined stereo image. It's all about giving each part its own space to breathe, which immediately makes everything sound clearer.
Think of your mix as a three-dimensional stage. Not everything can stand front and center. I always anchor the foundational elements—kick, snare, bass, and the lead vocal—right down the middle. This gives the track a solid, punchy core that everything else can build on.
But what about the rest of the instruments? This is where strategic panning can completely transform a mix from a cluttered mess into an expansive, immersive soundscape.
The goal here is to use the entire stereo field. When you start placing supporting instruments off-center, you instantly reduce the chances of them fighting each other for the same frequencies. It creates a sense of depth and dimension that just wasn't there before.
This isn't about randomly panning everything hard left or right. It's about thoughtful placement.
Here’s a classic, effective layout I use all the time:
This simple approach ensures instruments aren't tripping over each other. If you want to dive deeper into this, our complete guide on panning in music is packed with more strategies.
Subtlety is key. Sometimes a tiny adjustment in the stereo field can create a massive improvement in clarity, stopping the mix from feeling cramped and muffled.
Finally, for things like backing vocal busses or synth pads, a gentle stereo widening plugin can add that last bit of professional polish. Just be careful not to overdo it and introduce phasing issues, which can thin out your mix in a hurry.
So, you've tweaked your EQ, dialed in your compression, and things are sounding better. But sometimes, a few frustrating issues just refuse to go away. Let's dig into the common hangups that pop up when you're this close to a polished mix.
Ah, the classic translation test. This one gets everybody. Headphones have a way of flattering a mix, especially in the low end, but your car stereo? It’s brutally honest. Most car systems have a built-in bump in the low-mids, which instantly turns any muddiness around 200-500 Hz into a swampy mess.
What sounds punchy and balanced in your cans can quickly become a boomy, undefined nightmare on the road. This is also where a weak stereo image falls apart. The only real way around this is to constantly check your mix on different systems. Bounce between your monitors, headphones, your car, and even your phone speaker. The goal isn't perfection on one system; it's a solid balance that works everywhere.
One hundred percent. Think of a high-quality reference track as your objective benchmark. It’s a reality check for your ears, which absolutely get tired and lose perspective after hours of listening to the same loop.
When you A/B your mix against a professionally released song in the same genre, the differences jump out at you immediately.
This is hands-down the fastest way to figure out what's missing. Whether it's an EQ imbalance, a lack of dynamic punch, or just overall loudness, a good reference track will point you right to the problem.
Okay, so you’ve wrestled with EQ, compression, and stereo width, and you're still hitting a wall. It’s time to look at the source. Sometimes, the problem is baked in from the very beginning. A dull vocal recorded with a poorly placed mic is almost impossible to fix in the mix without it sounding processed and unnatural.
Another culprit could be your room. If you're mixing in a space with untreated acoustic issues, especially in the low end, you might be cutting or boosting frequencies based on what your room is telling you, not what's actually in the track. When all else fails, get a fresh pair of ears on it. Send it to a fellow producer for feedback or consider getting it professionally mastered. A new perspective can be a total game-changer.
Don't let a tricky listening environment undermine all your hard work. CarMaster is designed to solve this exact problem by mastering your music specifically for car audio systems, making sure it translates with clarity and punch instead of mud.
You can hear the difference for yourself. Get a free, car-ready master preview at https://www.carmaster.io.

.png)