
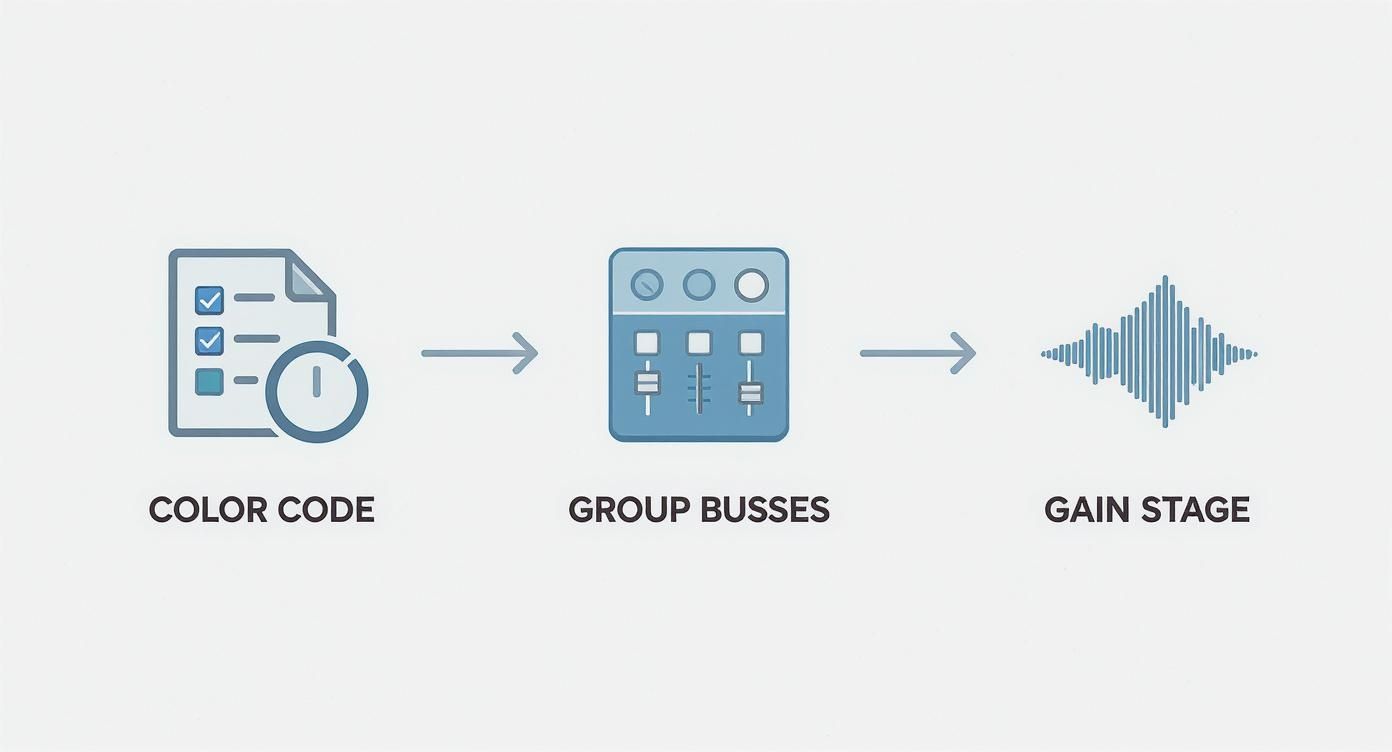
To really nail a mix, the first thing I do—before I even think about EQ or compression—is get my Digital Audio Workstation (DAW) session in order. A lot of people skip this, but it’s the secret sauce for a smooth, professional workflow. We're talking about the essentials: color-coding tracks, creating group busses, and setting proper gain levels.
It's the difference between a clean, manageable project and a chaotic mess.
Look, before you touch a single fader, you've got to build a solid foundation. An organized session isn't just about looking neat; it’s a massive strategic advantage. It saves you time, cuts down on confusion, and honestly, it just leads to better mixing decisions.
Jumping into a chaotic project is like trying to cook a gourmet meal in a kitchen with dirty dishes piled everywhere. It’s slow, frustrating, and kills your creative vibe. A clean setup lets you fly around the project, even with hundreds of tracks, making those quick, precise adjustments that separate a good mix from a great one.
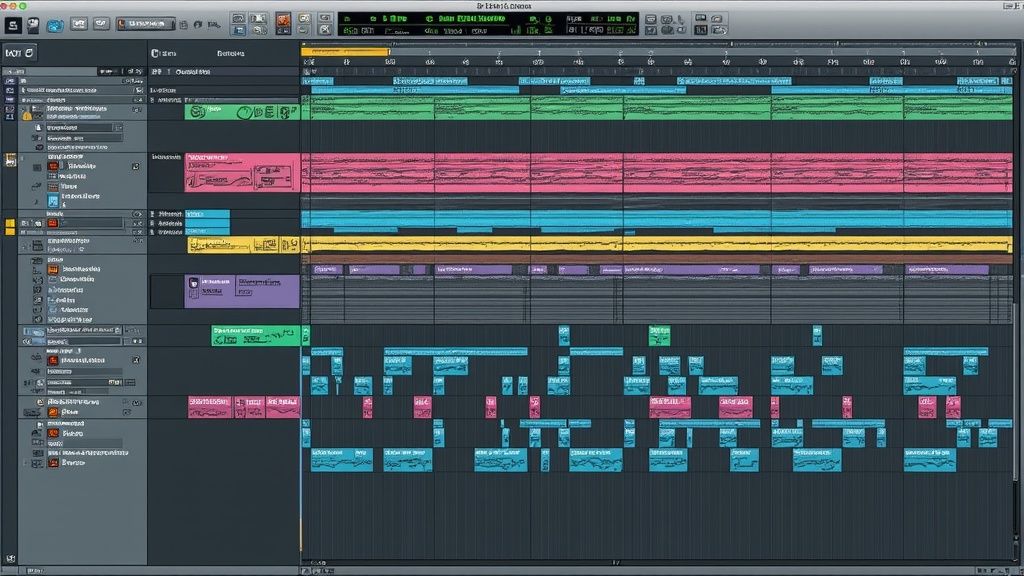
The very first habit I recommend is color-coding. It’s simple but incredibly effective. I assign specific colors to different track types—maybe blue for drums, green for guitars, and yellow for vocals. This creates an instant visual map of my session.
When I see a block of blue, my brain immediately knows "rhythm section" without having to read a single track name. It's a huge time-saver.
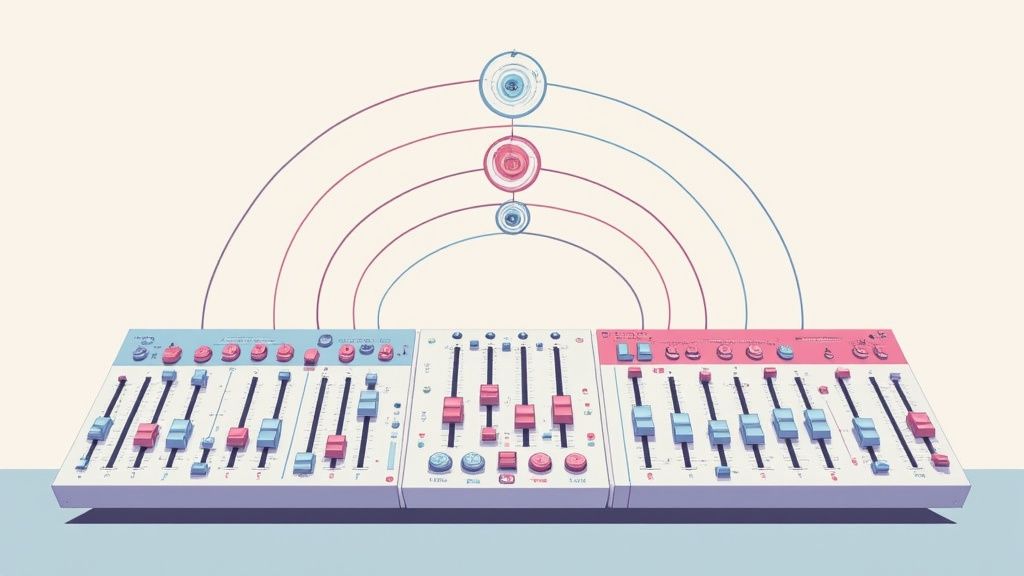
Next up, I create busses (some DAWs call them submixes or groups) for related instruments. I’ll route all my individual drum tracks—kick, snare, hi-hats, toms—to a single "Drum Bus." I do the same thing for my background vocals, synths, and guitars. This approach radically streamlines the mix. Instead of tweaking ten different drum faders, I can control the entire kit's volume with just one.
This isn't just about volume control. It lets you process entire groups of instruments together. Slapping a compressor or EQ on a drum bus, for instance, helps "glue" all the drum elements together, making them sound like one cohesive, powerful instrument.
The infographic below breaks down this simple three-step prep process.
Following this workflow—color-coding, grouping, and then gain staging—builds a logical structure right from the start and helps you avoid a ton of technical headaches later on.
Finally, let’s talk gain staging. This is all about setting the initial volume of each audio track to an optimal level before you add any plugins. My personal target is to have individual tracks peaking somewhere around -18 dBFS.
This simple step prevents digital clipping (that nasty distortion you never want) and gives you plenty of headroom for the rest of the mixing and mastering process.
The whole craft of mixing songs has come a long way. Back in the 1970s, DJs like Kool Herc were pioneering beatmatching by hand on two turntables. Fast forward to the 1990s, and with the invention of pitch control, it was estimated that over 80% of professional DJs were using beatmatching techniques, mostly with vinyl. You can learn more about how music production has evolved and how it shapes the techniques we use today.
By setting your levels right from the get-go, you're giving your mix a clean, dynamic foundation to build upon—no unwanted distortion, just pure potential.
Alright, with all your tracks organized, it’s time to get into the real meat of the mix. Before you even think about reaching for an EQ or compressor, we need to build a solid foundation. This is what we call the static mix, and it’s crafted using just two things: your volume faders and your pan knobs.
Honestly, this is where the magic really starts. A good static mix is all about creating a clear and powerful balance from the jump. It’s not just about making sure you can hear everything; it’s about defining the relationships between all the elements in your track. Get this right, and everything else becomes ten times easier.
First things first, find the heart of your song. In most pop, rock, or hip-hop tracks, this is usually the lead vocal or the core rhythm section—your kick and snare. Pull up the fader on that key element until it's sitting at a comfortable level. This is your anchor.
Now, start bringing in the other instruments one by one. Don't just shove everything up at once. Think of it like putting a band together on stage. Your lead singer is front and center, and you’re carefully placing every other musician around them to create a full, cohesive sound.
I see a lot of producers make the mistake of pushing all the faders up and then trying to carve out space by turning things down. Flip that process around. Build your mix from the ground up, starting with your most crucial parts and blending everything else in around them.
Let's say you've got your vocal and kick drum sitting nicely. Next, bring in the bass. Does it lock in with the kick, or is it fighting for attention? Nudge the fader until they feel like a single, powerful unit. After that, slowly introduce your guitars, synths, and backing vocals, always checking how they gel with the foundation you’ve already built. This method feels way more natural and almost always leads to a cleaner mix.
Once you've got a decent level balance, it's time to create some width. This is where panning comes in. Panning is your best friend for separating instruments that are clashing in the same frequency range, and it’s the key to stopping your mix from sounding like a cluttered mess in the center.
Don't just slam things hard left and hard right. The real art is in using the entire stereo spectrum to give every sound its own pocket to sit in.
A great way to think about it is to visualize a band on a stage. The kick, snare, bass, and lead singer are almost always dead center. They are the anchor of the performance. Then you have the guitarists, keyboard players, and backing vocalists spread out across the stage. Let's mimic that.
Here are a few go-to strategies I use all the time:
By giving each instrument its own spot in the stereo field, you’re creating clarity and dimension. If you want to really master this, we have a complete guide on panning in music that goes even deeper. Nail your levels and panning, and you're honestly 90% of the way to a professional-sounding mix.
Alright, your static mix is set and the levels are feeling good. Now the real fun begins. We're moving beyond simple balancing and into the world of sonic sculpting with EQ and compression.
These tools are often seen as just ways to fix problems, but that's selling them short. Their true power is in enhancing the vibe and emotional core of your song. Let's dig in.
Think of your equalizer (EQ) as a chisel. Your first instinct might be to boost frequencies to make things sound "better," but the pros almost always start by cutting. This is called subtractive EQ, and it's a game-changer.
By carving out frequencies that an instrument doesn't need, you create pockets for other instruments to sit perfectly. This leads to a much cleaner, more defined mix where everything has its own space.
A classic first move is throwing on a high-pass filter (HPF). This little tool is your best friend for cleaning up low-end mud. You can apply a gentle HPF to vocals, guitars, and cymbals to instantly remove rumble they don't need, clearing up a massive amount of room for your kick and bass to really hit hard.
Then there's surgical EQ. Got an annoying "ring" from a snare drum or a harsh, piercing tone in a vocal? Use a very narrow EQ band to find that specific frequency and pull it down. You're not changing the whole sound, just removing the one distracting part. It's like audio snipering.
Pro Tip: Don't just guess where to cut. Create a narrow EQ band, boost it way up, and "sweep" it across the frequency spectrum. When you hit a frequency that sounds particularly nasty, that's your target. Just flip the boost to a cut, and you're done. Fast and brutally effective.
To get you started, here's a quick cheat sheet for some common EQ moves. Remember, these are just starting points—let your ears be the final judge.
Think of this table as a starting map for your sonic journey. Every instrument and every recording is different, so don't be afraid to experiment.
Once your tracks have their own sonic space, compression is what you'll use to control their dynamics and make them sit still in the mix. At its core, a compressor is just an automatic volume knob. It turns down the loudest parts of a sound, which lets you turn up the overall volume without clipping.
Take a vocal performance, for example. The singer might get super loud on some words and whisper others. A compressor smooths out those peaks and valleys, giving you a much more consistent, professional-sounding track that's easier to hear.
Or think about a snare drum. A little bit of compression can add that "snap" and "punch" that makes it cut through the densest mix like a knife. If you want to dive deeper, we have a whole guide on what compression does in music that's worth a read.
This whole process is getting an interesting shake-up lately. AI is finding its way into mixing software, and it's changing how producers get things done. In fact, the music mixing software market is projected to grow at a CAGR of about 10% through 2033, largely because of AI assistants that help with complex tasks like EQ and compression.
For producers who've jumped on board, the time it takes to get a solid mix has dropped by an average of 30%. It's a pretty wild trend that's helping people get better results, faster.
By using EQ to give every element its own lane and compression to keep the dynamics in check, you’re no longer just working with a bunch of random recordings. You’re shaping them into a powerful, cohesive song.
A perfectly leveled and EQ'd mix can still feel… well, flat. Clinical. If everything sounds like it’s right up against your ear, it lacks a sense of space—that feeling of instruments actually existing together in a room. This is where effects like reverb and delay are your best friends, turning a two-dimensional recording into something you can almost walk around in.
Now, here's the professional move: use an auxiliary (aux) send or effects bus. Don't just slap a separate reverb plugin on every track. That’s a fast way to hog your computer’s processing power and end up with a soupy, chaotic mess. Instead, set up one dedicated reverb track. Then, you can "send" a little bit of your vocal, your snare, or anything else to that one bus. This is huge, because it makes it sound like those different elements are all sharing the same physical space, which glues your whole mix together.
Think of reverb as choosing a location for your song. The type of reverb you pick completely changes the vibe. Are you in a tight, intimate studio? A shimmering concert hall? A vintage echo chamber?
Here’s my go-to breakdown of the basics:
Quick tip from experience: a common rookie mistake is to send every instrument to the same massive hall reverb. Don't do it. You'll end up with a washed-out, undefined mix. Instead, create layers of depth. Use shorter reverbs for your upfront elements and save the long, dreamy ones for things you want to feel far away.
If reverb is about creating a space, delay is about creating rhythm and thickness. It’s an incredibly versatile tool.
A simple, quick repeat—what we call slapback delay—can instantly make a lead vocal sound bigger and more present without getting lost in a sea of reverb. It's a stone-cold classic trick you've heard on thousands of rock and pop records for a reason.
Want to get more creative? Try syncing your delay time to the song's tempo. A quarter-note delay echoing a guitar riff or a dotted-eighth note delay bouncing off a vocal phrase can create this awesome rhythmic conversation within the track. It adds movement and keeps things interesting for the listener.
And let’s not forget about subtle modulation. A touch of chorus on a clean electric guitar or a synth pad can give it a little wobble and width, helping it pop out of the speakers without being obnoxious. At the end of the day, every effect you add should serve the song and enhance the emotion—not just be there for the sake of it.
 Getting your mix to slam in your studio is a great feeling, but that's really just the halfway point. A mix isn't truly finished until it sounds great everywhere—from a premium car stereo to a pair of cheap gas station earbuds.
This is the stage where you stop obsessing over individual tracks and start treating the entire song as one single piece of music. It’s all about subtle polish and a series of reality checks to make sure your hard work holds up out in the wild.
Right before you bounce the track, it’s worth adding some light processing on your main output (your mix bus or master fader). The goal isn't to make drastic changes but to add a touch of polish that helps all the elements feel like they belong together. Think of it like a light varnish that makes the colors of a painting pop.
My go-to chain is super simple but incredibly effective: a little bit of EQ followed by a gentle compressor.
The real secret here is subtlety. You should barely even notice the processing is on. The test is to bypass it—if the mix suddenly feels like it falls apart a little, you've nailed it. If the compressor is pumping or the EQ change is obvious, you’ve definitely gone too far.
One of the most valuable things you can do is compare your mix to professionally released tracks in the same genre. This is called referencing, and honestly, it’s non-negotiable if you're serious about your craft.
Just drag a few of your favorite songs into your DAW session on a new track. Keep it muted while you work, but flip back and forth between your mix and the reference track every so often.
Listen for a few specific things:
This process gives you an objective perspective and quickly reveals where your mix might need work. It's a standard practice across the board, especially in the electronic music world, which recently hit a massive $12.9 billion global value. That growth is driven by producers who know how to create seamless, high-quality mixes that compete on major streaming platforms.
Alright, it’s time for the moment of truth. Export a version of your track and listen to it on every single speaker system you can get your hands on.
I’m talking about:
Cars are notorious for exposing mix problems, especially weirdness in the low-end and issues with your stereo imaging. If your mix sounds solid on all these different systems, you can be confident you’ve created something that will connect with listeners, no matter how they're hearing it.
For a deeper dive into getting your audio ready for the real world, check out our guide on the audio mastering chain.
Even with a solid workflow, a few key questions always seem to trip people up, especially when they're new to mixing multiple songs. Getting these answers straight can save you a ton of headaches and help you mix with more confidence.
Let's dive into some of the big ones that pop up when you're nearing the finish line. Navigating terms like "headroom" and knowing the difference between mixing and mastering is crucial for getting your track ready for the final steps.
This is a monster of a question, but the answer is way simpler than you might think. A good rule of thumb is to have the loudest parts of your mix peaking at around -6 dBFS (decibels full scale) on your master fader.
That number isn't random. Leaving that space—what we call headroom—is absolutely vital for the mastering stage. It gives the mastering engineer (or an AI service) the dynamic space they need to do their job without smashing your track into a wall of digital distortion.
Your job in the mix stage is to get the balance right, not to win the loudness war. That comes later.
Handing a mastering engineer a mix that’s already hitting 0 dBFS is a nightmare scenario. It’s like giving a painter a canvas that’s already covered in black paint—there’s just no room left to add any polish or brightness. Focus on balance first, loudness later.
I like to think of it like building a car versus prepping it for the showroom floor.
Mixing is the nitty-gritty assembly process. You're taking all the individual parts—the drums, bass, vocals, synths—and making them work together. You're adjusting levels, EQ, panning, and adding effects until it sounds like one cohesive, powerful machine. The goal is to produce a single stereo file that represents your finished song.
Mastering is the final detailing and quality control. You take that single stereo file and give it a final polish before it goes out into the world. This is where you optimize the overall loudness to compete with other commercial tracks, tweak the final tonal balance, and make sure it translates well on everything from tiny earbuds to club PAs and, of course, car stereos.
The brutally honest answer? A mix is never really finished; it’s just abandoned. But there are definitely signs that it's time to step away and call it done.
Your mix is ready when every instrument has its own space to breathe and the song's emotional core is hitting you right. If you find yourself just nudging a fader up a tenth of a dB and then back down—making changes that are just different, not better—you're probably done.
The ultimate acid test is translation. Does it still sound good on your main monitors? In your headphones? In your car? If your mix survives that journey without falling apart, it’s ready.
Want to make sure your mix survives the car test every single time? CarMaster is the only AI mastering service built from the ground up to protect your music from sounding awful on car audio systems. Upload your track for a free, instant preview and hear it for yourself. Get your professional, car-ready master in just a few minutes at https://www.carmaster.io.

.png)