
An audio mastering chain is the specific sequence of processors you run a final mix through to get it ready for the world. It’s the very last creative step in the production process, and its job is to polish a track’s tonal balance, dynamic range, and overall loudness.
Think of it as the final detailing stage for a song before it hits your listeners' ears.
If mixing is like carefully bolting together all the parts of a car—the engine, the chassis, the wheels—then mastering is the final quality check and detailing process. You’re not rebuilding the engine. You’re washing, waxing, and inspecting every inch to make sure that car is absolutely perfect for the showroom floor.
The audio mastering chain is simply the set of specialized tools you use to get that final polish.
This chain is what makes your music sound cohesive and professional, no matter where it's played. From tiny earbuds and laptop speakers to massive club PAs, a proper master ensures your track translates. It's the critical process that gets your music ready for release on Spotify, Apple Music, and everywhere else.
The order of the processors in your chain is everything. Each tool affects the sound before it moves on to the next one, creating a cumulative effect. It's a domino effect, so you need to set them up in the right order.
A typical workflow looks something like this:
This logical flow keeps you from fighting your own processing. For example, if you compress a signal after boosting some nasty frequencies with an EQ, you're just making those problems louder and way harder to fix. Get the order right from the start.
An audio mastering chain is less about fixing mistakes and more about enhancing what’s already great. The goal is to take a solid mix and elevate it, making sure its artistic impact is fully realized on any playback system.
At its core, the purpose of a mastering chain has always been about enhancing overall audio quality for a professional sound. This concept has come a long way.
Historically, mastering chains were built from hulking analog hardware. We're talking physical equalizers and compressors in the mid-20th century, where every knob turn was a commitment. When digital audio stormed onto the scene in the 1980s, it introduced plugins that offered surgical precision, completely reshaping the modern mastering workflow. This evolution from analog warmth to digital control is a huge part of what makes mastering what it is today.
Alright, let's open up the toolbox. A solid mastering chain is really just a handful of core processors, each one pulling its own weight. Think of it like a sonic pit crew: one specialist does the cleanup, another glues everything together, a third adds that professional sheen, and the last one makes sure it's loud enough for the club without falling apart.
Getting a handle on what each tool does is the first step. But just as important is the order you put them in. This isn't random; it's a strategic workflow where each processor builds on the work of the one before it.
Let's break down the key players you'll find on this sonic assembly line.
More often than not, the first stop for your audio is the Equalizer, or EQ. In mastering, its main job is corrective surgery. An EQ is your scalpel for boosting or cutting specific frequencies to fix any tonal imbalances baked into the final mix.
Picture your mix as a great photo that's just a little soft in a few spots. The EQ is the sharpening tool that lets you bring those areas into focus without touching the parts that are already perfect. Got a bit of mud in the low-end? A precise cut around 200-300 Hz can work wonders. Vocals need a little more air to breathe? A gentle, silky boost above 10 kHz can open things right up.
Unlike mixing, where you might make broad EQ strokes on a single instrument, mastering EQ is all about surgical precision. We're talking tiny adjustments—often just a decibel or two—that have a huge cumulative effect on the track's overall clarity. Most seasoned engineers will tell you to try a "subtractive" approach first, meaning you cut problem frequencies before you even think about boosting anything.
The whole point is to create a tonally balanced foundation before you move on to anything else, which is why EQ almost always comes first. Honing your ears for these subtle frequency problems is a crucial skill, much like the process you'd follow if you were learning how to EQ vocals to make them sit just right.
Before we dive into the other tools, let's lay out the typical lineup. While every track is different, this is a fantastic starting point for understanding how the pieces fit together.
This table gives you a bird's-eye view of the standard signal flow. Now, let's get back to the individual components.
With the tone balanced, it's time to bring in the Compressor. Its purpose is to manage the track’s dynamic range—that is, the difference between the quietest and loudest moments. In mastering, compression is the "glue" that makes all the separate parts of the mix feel like they belong together.
Think of it as a super-fast, automated volume knob. It intelligently turns down the loudest peaks by a tiny, controlled amount. This gives you the headroom to raise the overall volume of the entire song without it distorting or "clipping." The result is music that feels fuller, punchier, and just plain more powerful.
A great mastering compressor is one you feel more than you hear. The idea isn't to squash the life out of your track, but to gently tame the dynamics for a consistent and impactful listening experience.
Getting this right comes down to a few key settings:
By smoothing out those wild peaks, the compressor gets the track ready for the final loudness stage, handing off a much more controlled and polished signal.
This image gives you a simple visual of what an EQ is doing—adjusting the lows, mids, and highs to sculpt the sound.
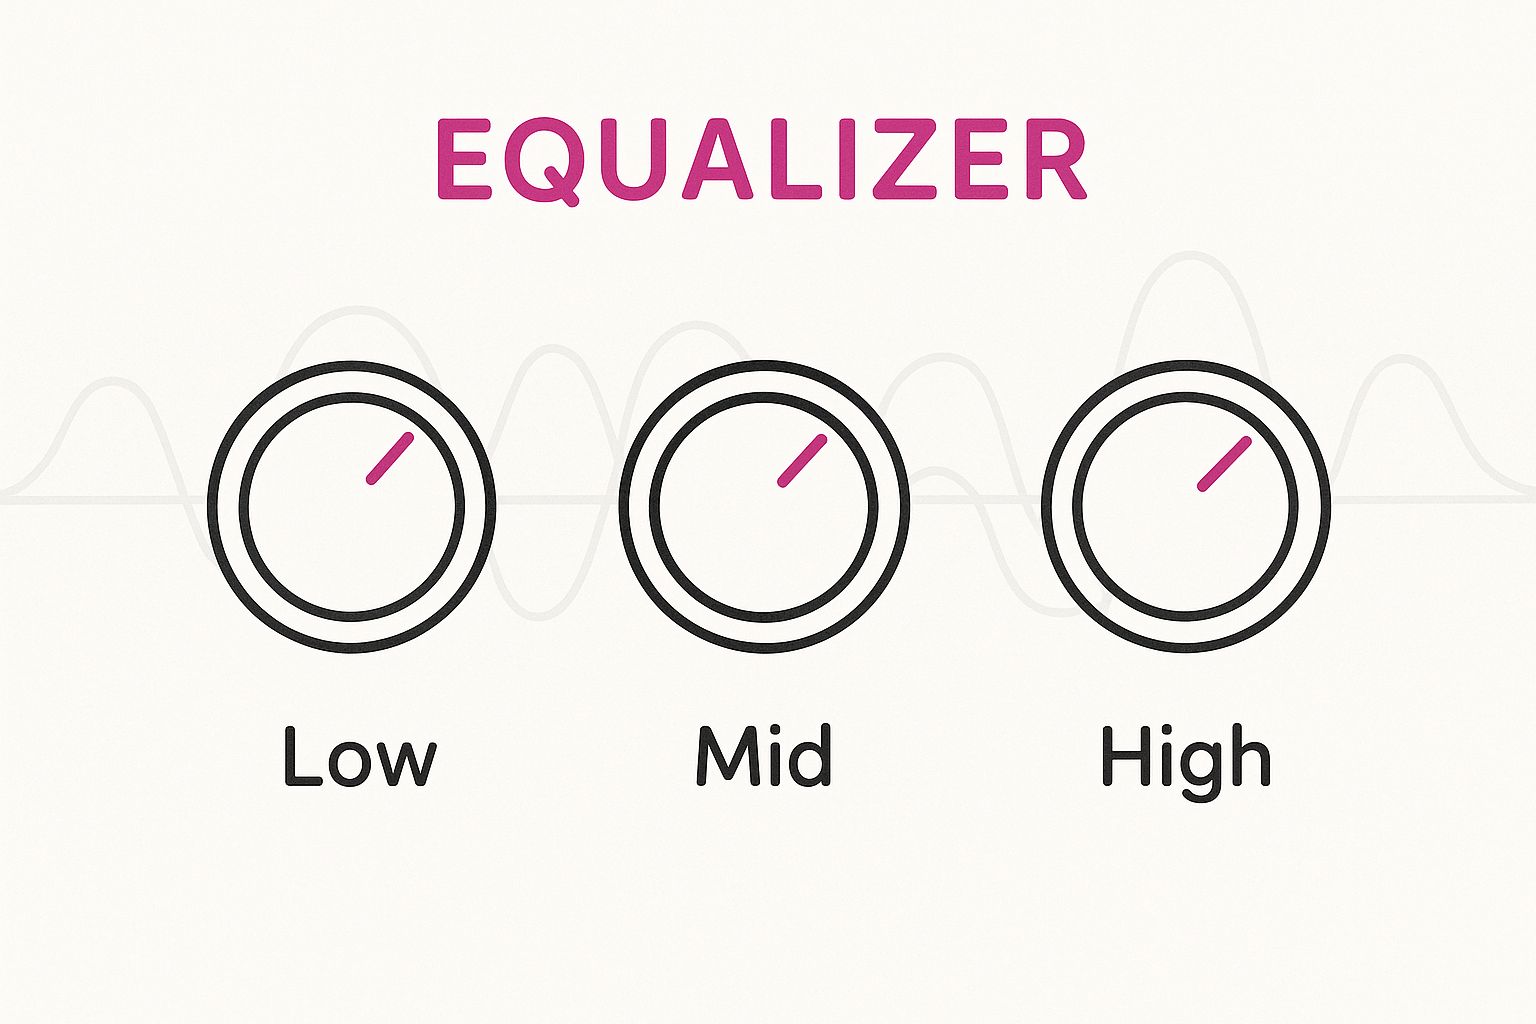
It’s a good reminder that mastering EQ isn’t about drastic changes, but rather small, targeted tweaks that lead to a balanced and professional-sounding final product.
Once the foundational work of EQ and compression is done, you might want to add a little "color" or "vibe." This is where you'd reach for tools like Saturation and Stereo Imagers. They aren't always needed, but they can provide that last 5% of polish that separates a good master from a great one.
Saturation introduces subtle harmonic distortion, which can make a track feel warmer, richer, and more alive. It's like adding a pinch of a special spice to a dish—it just enhances what's already there. It's also a sneaky way to add perceived loudness and presence without actually turning up the peak levels.
Stereo Imaging tools give you control over the width of your soundstage. A common trick is to make the low frequencies more focused in the center (mono) to give the track a solid, punchy foundation. At the same time, you can widen the higher frequencies just a touch to create a more immersive, spacious feel. A word of caution: it's easy to go too far and create phase issues that can make your track sound thin or weird on certain speakers.
Of course, to build your chain, you'll need a digital audio workstation and some plugins. If you're just starting out and looking for accessible tools, there are plenty of great free audio editing software options to get you going.
The very last processor in any and every professional mastering chain is the Limiter. It has one critical job: cranking up the overall volume to a competitive commercial level without ever letting the audio clip or distort. It's the final gatekeeper that sets the absolute ceiling for your sound.
A limiter is basically a compressor on steroids, with an infinitely high ratio. You set a maximum output level—say, -0.5 dBTP (decibels true peak)—and the limiter slams the brakes on anything trying to go past that point. By pushing the track's level up into this ceiling, you increase its perceived loudness.
The real art is finding that sweet spot. You want the track to be loud and impactful, but not so loud that you've squeezed all the life and dynamics out of it. Push it too hard, and you'll end up with a flat, fatiguing mess. Get it just right, and you’ll have a master that's ready for the world.
Alright, enough theory. Let's get our hands dirty.
Building your first mastering chain feels like a huge mountain to climb, but the truth is you can get incredible results using just the stock plugins that came with your DAW. The secret isn't fancy, expensive gear; it's about understanding the workflow and, more importantly, training your ears to make tiny, deliberate moves.
This guide will walk you through a simple but powerful three-plugin chain: EQ, Compressor, and Limiter. We'll focus on the process, give you solid starting points for settings, and help you get into the right mindset for mastering your own tracks.
Before you even think about loading a plugin, you have to set the stage. This is non-negotiable. Proper gain staging is all about making sure your audio signal hits that sweet spot—not too quiet, and definitely not too loud.
Trying to master a signal that's already clipping is like trying to polish a scratched-up table without sanding it down first. You're just making the flaws more obvious.
Your target here is to have your final mix file peaking somewhere between -6 dBFS and -3 dBFS. This gives your mastering plugins plenty of headroom to work their magic without adding nasty distortion.
Here’s how to get your session ready for action:
With your levels in a good place, it's time for your first processor: a basic Equalizer (EQ). The mission here is subtractive EQ. That means we're cutting out problem frequencies, not boosting the ones we like. Think of it as gently wiping the canvas clean before you start painting.
Load up your DAW's stock EQ and start hunting for anything that sounds muddy, harsh, or boomy.
The key to mastering EQ is subtlety. You’re making tiny, surgical adjustments to improve the track’s overall clarity, not trying to reinvent the mix. A cut of just 0.5 dB can make a world of difference.
Start with a high-pass filter and gently roll off the useless sub-bass rumble below 25-30 Hz. You can't hear it, but it eats up precious headroom. Then, listen for any "mud" in the low-mids (around 200-400 Hz) or piercing harshness in the upper-mids (2-5 kHz) and use very narrow, gentle cuts to clean it up.
Next up in the chain is your Compressor. In mastering, a compressor’s job is to act like "glue," gently taming the track's dynamic range. This helps the song feel more cohesive and powerful without completely squashing the life out of it. We're just looking for a touch of gain reduction to wrangle the loudest peaks.
Here are some safe starting points for your stock compressor:
This gentle squeeze will make your track feel tighter and more controlled, setting it up perfectly for the final loudness stage. If you're looking for a way to streamline this part of the process, a dedicated tool can be a game-changer. For instance, you can see how an AI-powered service handles these subtle moves with CarMaster AI mastering.
The last stop on our chain is the Brickwall Limiter. This plugin has one job: to raise the overall perceived volume of your track to a commercial level while setting a hard ceiling to prevent any clipping.
Here’s the simple setup:
Follow these steps, and you’ll have a solid, effective mastering chain. Just remember to constantly A/B test your master against the original mix. Make sure your changes are actually making it better, not just louder.
A mastering chain is never a one-size-fits-all formula. It’s a flexible toolkit that has to serve the music, first and foremost.
Applying the same chain to a delicate folk tune and a wall-shaking EDM track is like trying to paint a detailed portrait with a massive house-painting roller. The goal is completely different, so the tools and how you use them have to change. You need to adapt your approach to fit the sonic personality and listener expectations of each genre.
This is where you shift from a technical mindset to a creative one. The goal for a punchy rap track just isn't the same as for a spacious acoustic ballad. Every decision you make is about enhancing the song's emotional core.
Knowing the conventions of different genres is what separates the pros from the amateurs. And the demand for high-quality, genre-specific audio is exploding. The global market for audio editing and mastering systems was already around $3.8 billion in 2023 and is on track to hit nearly $7.6 billion by 2032. That growth is fueled by everything from music production to podcasts and video games.
This boom means there’s a real need for engineers who can deliver polished, appropriate results for any style. You can read more about this growing market over at cognitivemarketresearch.com.
So, let's break down how you’d build a mastering chain for three completely different styles.
EDM is all about one thing: energy. It needs to hit hard, feel massive, and move a dancefloor with a powerful low-end. The mastering chain here is built for maximum impact and competitive loudness, all while keeping the stereo image wide and immersive.
This is a genre where you can get a bit more aggressive with your tools. You’re crafting a master that needs to sound incredible on huge club sound systems.
A typical EDM audio mastering chain might look like this:
In a complete 180 from EDM, mastering for acoustic and folk music is all about subtlety and transparency. Your main job is to preserve the natural dynamics and the organic, human feel of the performance. Slap on too much processing, and you'll completely kill the intimacy that makes the genre so special.
The philosophy is simple: less is more. The audio mastering chain should be as clean and minimal as you can get away with.
For acoustic music, the mastering engineer's job is to be invisible. The best master is one that sounds like it was never mastered at all—it just sounds like a beautiful, finished recording.
Your chain for acoustic tracks should prioritize a light touch:
Hip-hop and rap mastering sits somewhere in the middle of our two extremes. The goal is a track that’s punchy, powerful, and clean, with a laser focus on a hard-hitting low-end and crystal-clear vocals. The beat needs to slam, and the vocals have to sit right on top, cutting through the mix with attitude.
This is a genre where you often want to add some character and vibe. Tools like saturation and harmonic exciters are your friends for adding warmth, grit, and presence.
A solid hip-hop mastering chain might look like this:
The rules of the game have completely changed. I remember a time, not too long ago, when the goal in mastering was brutally simple: make it loud. As loud as humanly possible. This was the "loudness war," and it gave us a decade of hyper-compressed, lifeless music. Thankfully, the rise of streaming giants like Spotify and Apple Music has called a ceasefire.
Today, the entire conversation revolves around Loudness Normalization. Instead of letting producers and artists crank the volume to eleven, streaming services analyze every single track and adjust its playback level to a specific target. This creates a much more consistent listening experience, so you're not constantly diving for the volume knob when the next song comes on.
This new standard is measured in LUFS, which stands for Loudness Units Full Scale. It's a way more accurate way to gauge how we actually perceive loudness compared to old-school peak meters. Most of the big platforms have landed on a similar target.
Here's the kicker: if your master is louder than their target, the platform just turns it down. Plain and simple. If it's quieter, they'll turn it up. This means there is absolutely zero advantage to squashing your music into a brick wall of sound anymore. In fact, it’s a disadvantage—an overly compressed track will just sound weak and crushed next to a more dynamic one once they're both normalized.
The modern mastering engineer's goal isn't to win the loudness war anymore. It's to create a dynamic, punchy, and clean master that sounds fantastic at the streaming service's target level. Your audio mastering chain should be built to prioritize dynamics over raw, pointless volume.
This new, data-driven world has opened the door for a whole new generation of tools. With streaming services setting the standard, mastering chains have had to adapt. We've shifted from heavy-handed compression to a more nuanced approach that preserves dynamics and clarity, and AI mastering tools are right at the forefront of this change. They can analyze a track’s sonic profile and dynamic range to make incredibly precise adjustments.
There's no denying the benefits of AI mastering services, especially if you're an independent artist. They offer incredible speed, accessibility, and affordability. A process that once took days and a serious budget can now be done in minutes for a fraction of the cost.
But you have to know the trade-offs.
Pros of AI Mastering:
Cons of AI Mastering:
The conversation around AI's role in music is a big one, touching on everything from creative control to who owns the final product. It’s a hot topic that keeps evolving, as we've seen in recent situations where artists demand masters from producers using AI tools.
Ultimately, AI is just that—another tool in the toolbox. The key is to use it wisely, understand its strengths and limitations, and make sure it serves your artistic vision, not the other way around.
Jumping into mastering can feel like stepping into a labyrinth of plugins and technical jargon. As you start piecing together your first mastering chain, a ton of questions are bound to pop up. Don't worry, it's completely normal.
Think of this section as a straight-to-the-point FAQ from a seasoned engineer. We'll cut through the noise and give you the real-world answers you need to start mastering with confidence.
Yes. Absolutely, 100% yes. The order of your plugins is critical because every processor in the chain directly affects the signal that the next one has to work with. It's a classic domino effect—what you do at the beginning has a massive impact on what's even possible at the end.
Let's take a simple example. If you put an EQ before a compressor, you're essentially telling the compressor which frequencies to react to most. Taming a boomy low-end with the EQ means the compressor won't have to work as hard when the kick drum hits. Flip them around, and the compressor squashes the whole signal first, and then the EQ has to try and fix the tone of an already-compressed sound. Both are valid techniques, but they create wildly different outcomes.
The standard signal flow (EQ > Compression > Limiter) isn't just a random suggestion; it's a battle-tested workflow. You clean up tonal issues first, then you control the dynamics, and finally, you bring up the overall level. Sticking to this logic gives you predictable, professional results, especially when you're starting out.
One of the biggest myths in the audio world is that you need a folder full of expensive, third-party plugins to get a professional sound. The truth? You can get fantastic results with the stock plugins that came with your DAW.
Seriously. Modern DAWs like Logic Pro X or Ableton Live are packed with high-quality EQs, compressors, and limiters that are more than capable of handling serious mastering work. The real secret isn't the price tag on the plugin; it's how deeply you understand the tools you already own.
Get surgical with your stock EQ. Learn the attack and release of your stock compressor until it’s second nature. A great engineer with basic tools will always get a better master than an amateur fumbling around with expensive software they don't understand. At the end of the day, it's the ear, not the gear.
This is probably the most common point of confusion, but the distinction is actually pretty simple once it clicks.
Here’s an analogy I like: if mixing is like building a car from all its individual components, then mastering is the final quality control and detailing before it rolls off the factory floor. One is about construction and assembly, the other is about presentation and polish.
The "louder is better" wars are officially over, thanks to streaming services. The right loudness for your master now depends entirely on where it's going to be heard.
For platforms like Spotify and Apple Music, the target to aim for is around -14 LUFS (Loudness Units Full Scale). Why? Because their systems use loudness normalization. If you upload a track that's louder than their target, they'll simply turn it down. All that aggressive limiting just gets undone.
Even more importantly, make sure your true peak level never goes above -1.0 dBTP. This leaves enough headroom to prevent the nasty distortion that can happen when your track gets converted to different file formats by the streaming platforms. The goal today isn't to be the loudest; it's to have a dynamic, clean master that sounds incredible after normalization.
Ready to get a master that’s optimized for every listening environment, especially the car? CarMaster uses specialized AI to ensure your bass is tight, your stereo image is clear, and your music translates perfectly from headphones to automotive sound systems. Protect your song from sounding bad in the car by getting your free, instant preview at https://www.carmaster.io.

.png)