
If you’re pulling your hair out asking, "why do my vocals sound muffled?" you're not alone. The problem usually isn't one single mistake, but a chain reaction of small issues that often starts way back in the recording process.
The most common culprit is something called frequency masking. This is where a buildup of muddy low-mid frequencies completely smothers the delicate high frequencies that give vocals all their clarity and presence. Think of it like taking a blurry photo—sure, you can try to sharpen it in editing, but the real problem happened when you clicked the shutter.
When your vocals lack that crisp, professional detail, it feels like they’re trapped behind a thick blanket. This muffled sound doesn't just sound amateurish; it kills the emotional punch of your song. The first step to fixing this is realizing the issue could be coming from one of three distinct stages of your production.
Pinpointing where things went wrong is absolutely crucial. You simply can't fix a recording problem with a mixing solution and expect great results.
This guide is your roadmap. We're going to systematically investigate every potential cause, following the signal from the moment you open your mouth to sing all the way to the final mastering touches. By breaking it down, you can stop the guesswork and start making targeted fixes that bring your vocals out from under that blanket.
The hunt for the source of your muffled vocals really boils down to looking at three main areas. Each one is a critical link in the chain, and a weak spot in any of them can introduce that dreaded mud.
This decision tree gives you a bird's-eye view of how to track down the source of the problem, from recording all the way through the mix.
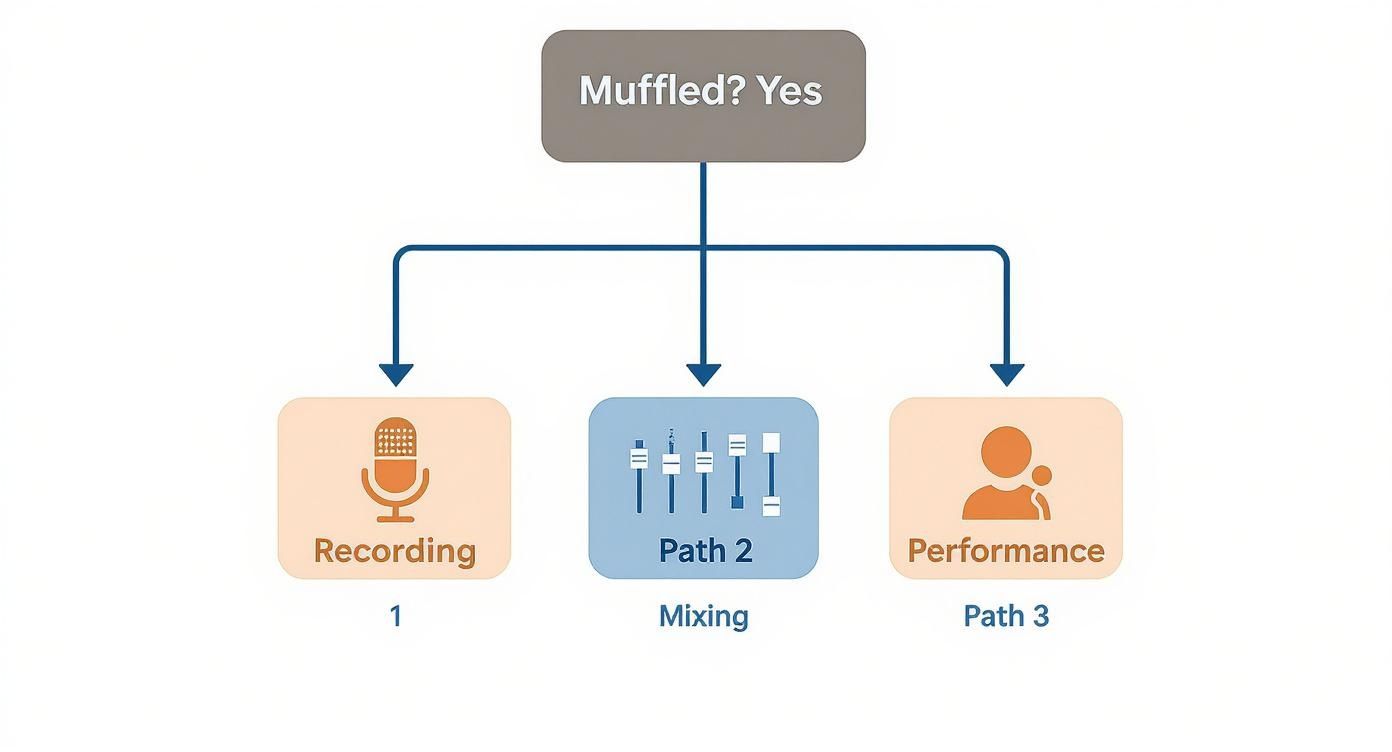
As you can see, your first checkpoint should always be the recording itself. More often than not, that’s where clarity gets lost.
Before we dive deep into each potential issue, here's a quick checklist to help you narrow down the possibilities right away.
Use this table as a starting point. If one of these symptom descriptions jumps out at you, that’s probably the best place to begin your investigation. Now, let’s get into the details of each one.
Your hunt for a crisp vocal sound starts the second you hit record. Seriously. Forget about plugins and faders for a minute, because your physical recording setup is the first—and most important—line of defense against a muffled track.
Think of it like taking a picture. If your camera lens is out of focus, no amount of Photoshop wizardry can truly bring back that lost sharpness. It’s the same with audio.
So many producers waste hours trying to "fix it in the mix," battling problems that were baked in from the very beginning. A bad recording is a weak foundation. Everything you build on top of it is going to be shaky. This is why getting a handle on your recording chain is an absolute must if you're trying to figure out why your vocals sound muffled.
One of the most common culprits behind a muddy vocal track is simply bad mic placement. Specifically, we need to talk about the proximity effect. This is a real-world physics thing that happens with most mics—the closer a singer gets, the more the low frequencies get a massive boost.
Sure, getting up close can give you that intimate, warm radio voice vibe. But push it just a little too far, and you’ve got a recipe for mud. Singing even an inch or two too close can drown your vocal in a thick layer of bass, completely smothering the delicate high frequencies that give a vocal its clarity and edge.
Key Takeaway: The proximity effect is a trade-off. For every inch you move toward the mic, you swap high-end detail for low-end boom. The trick is finding that sweet spot before things get out of control.
As a starting point, try placing the mic about 6-12 inches away from the singer. This is usually the money zone—you capture the full body of the voice without the overwhelming boominess that instantly makes a vocal sound muffled.
Even with perfect mic technique, you can end up with a distant, undefined vocal if your room is fighting against you. Bare walls, big windows, and hardwood floors are your worst enemies.
When you sing, sound waves fly out, hit those hard surfaces, and bounce right back into your microphone just milliseconds later. What you get is a messy wash of tiny echoes that smear all the crisp details of your vocal performance. It's like trying to read text with a blurry, transparent copy layered right on top.
You don't need a million-dollar studio to fix this. Simple moves can make a world of difference:
By getting your recording environment under control, you’re making sure the mic is capturing just one thing: the direct, clean sound of the voice.
For a deeper dive into setting your space up right, check out our guide on how to record vocals at home. Nailing this first step will save you countless hours of frustration later on.
Let’s get one thing straight. To figure out why your vocals are muffled, you have to stop thinking in terms of "loud" and "quiet." That’s not how sound works.
Instead, think of your mix like a painting. It’s full of rich colors, different shades, and vibrant hues. In the world of audio, those "colors" are called frequencies.
Every single sound in your track, from the deep boom of a kick drum to the shimmery crash of a cymbal, is a unique blend of low, mid, and high frequencies. Your vocal is no different—it's a complex tapestry of tones that spans the entire audio spectrum.
When your vocals pop and sound crystal clear, it’s because all those frequency "colors" are in balance. But a muffled vocal? That's like someone slapped a grey, dusty filter over your painting, sucking the life out of all the bright, punchy details.
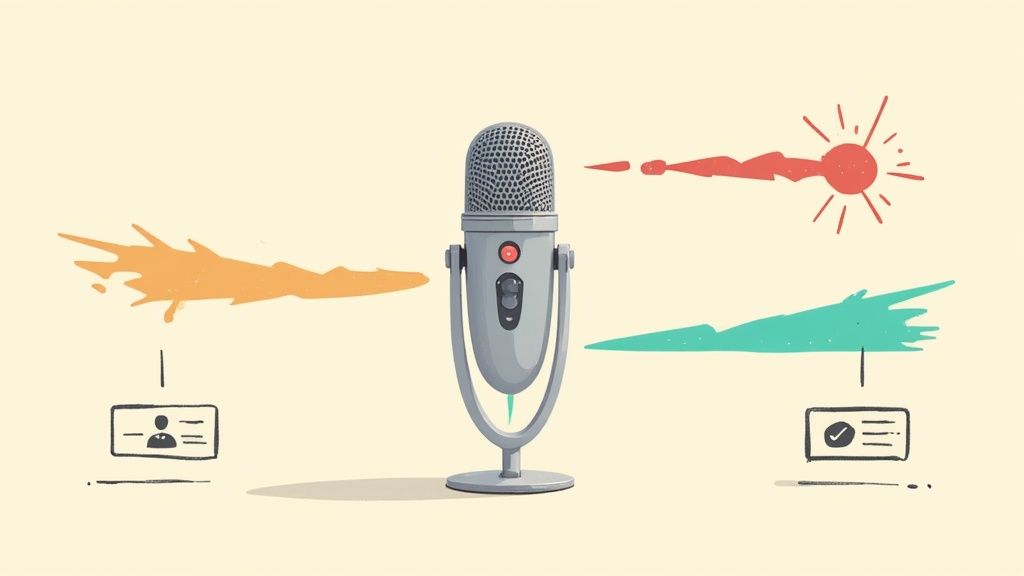
So, where’s the secret to that bright, clear vocal sound? It all comes down to one specific area of the frequency spectrum. Sure, the body and warmth of a voice hang out in the lower frequencies, but the intelligibility—the part that makes the lyrics cut through and feel right in your face—lives entirely in the highs.
More specifically, the magic happens between 2 kHz and 5 kHz. This is the "presence" zone. It's where you find the crisp, sharp attack of consonants like 'T', 'K', and 'S'. If you don't have enough energy happening in this range, the vocal is going to sound buried, distant, and muffled. Every single time.
A muffled vocal isn't necessarily a bad recording. It’s usually just a track where the crucial high-frequency details got lost or covered up, stopping the voice from slicing through the mix.
This loss of high-frequency information is the root of the problem. Research on audio perception actually shows that when these critical upper frequencies are missing, our brains have a tough time piecing together the consonant sounds that are vital for understanding speech. This is true whether the problem started during recording, was created in the mix, or is even related to hearing loss. If you want to dive deeper, you can explore the science behind vocal perception to see just how our ears process these sounds.
Where do these all-important frequencies disappear to? They don't just evaporate. Usually, they're either filtered out by mistake during recording or, more commonly, completely drowned out by other instruments in the mix.
Picture trying to have a conversation in a packed, noisy bar. Your voice is still there, but it's getting swallowed by the chaos around you. In a mix, that "chaos" could be anything:
Getting your head around this is the first real step. Before you even think about grabbing an EQ or compressor, your job is to play detective and figure out what’s either stripping away or masking those essential high frequencies.
So you’ve got a solid recording, but the vocal still sounds like it's stuck behind a curtain. What now? It’s time to grab your most powerful mixing tool: the equalizer, or EQ.
I want you to think like a sculptor staring at a block of marble. Your job isn't to slap on more clay. It's to carefully chip away the excess stone to reveal the art that’s already there.
This is the core idea behind subtractive EQ, and it’s how the pros get that radio-ready clarity. The amateur move is to just crank up the high frequencies, but that usually just adds a layer of harshness. We're going to be smarter. We’ll surgically remove the problem frequencies first.
By carving out the junk, you let the good stuff—the natural clarity in the vocal—shine through all on its own. It's the secret to fixing a muffled vocal without making it sound thin or brittle.
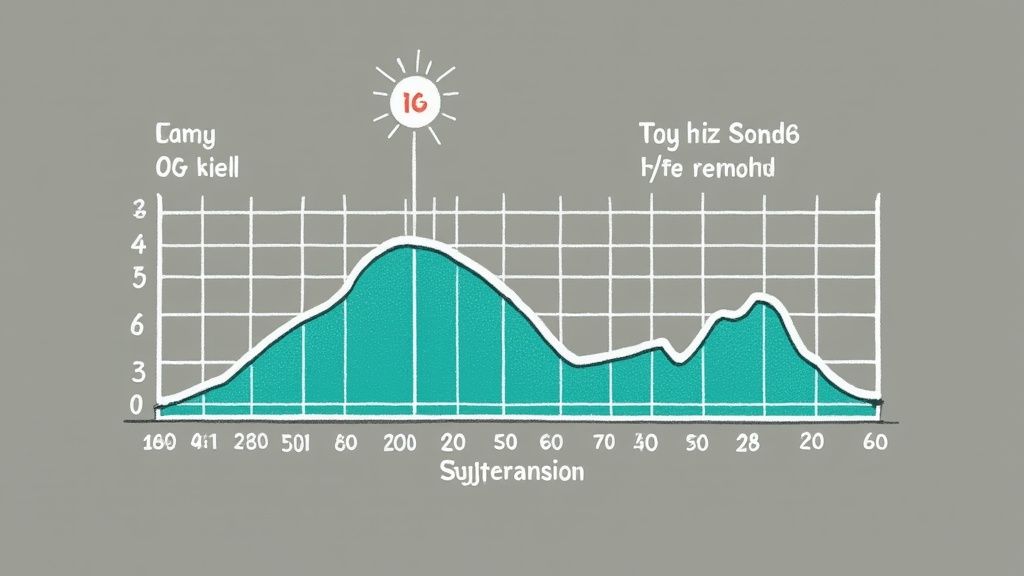
The number one culprit behind a muffled vocal is almost always a buildup of low-mid frequencies, typically somewhere between 200 Hz and 500 Hz. This is what engineers call the "mud" or "boxiness" region. Too much of it, and your vocal sounds cloudy, indistinct, and trapped in a cardboard box.
Your first move is to hunt down and reduce these frequencies. Don't be shy; this is a surgical cut that can transform your sound in seconds.
Seriously, this one move is often the single most effective thing you can do to fix a muffled vocal. You haven't added anything artificial, you've just cleaned up what shouldn't have been there in the first place.
Now that the mud is gone, you’ve created room for the vocal’s natural clarity to breathe. Only now should you think about adding a touch of sparkle with a few gentle, targeted boosts. This is where the magic happens.
Pro Tip: Always cut before you boost. If you clean up the mud first, any high-frequency boosts you add will sound clean and musical. Try to boost first, and you’ll just be putting lipstick on a pig—it’ll be harsh and sitting on a messy foundation.
Learning to wield an EQ is a fundamental skill for any producer. If you want to dive deeper, our complete guide on how to EQ vocals will walk you through even more advanced strategies to nail your sound. Master these steps, and you'll have the power to take any vocal track from muffled to magnificent.
Alright, so you’ve sculpted your vocal with EQ and it's starting to sound right. The next hurdle is managing its dynamics, and this is where a lot of producers, even experienced ones, can accidentally undo all their hard work.
Over-compression is a really sneaky reason why your vocals sound muffled, even after you've painstakingly balanced all the frequencies.
Picture your vocal track as a sponge soaked with water. A light squeeze from a compressor helps even things out, controlling the loudest splashes without draining all the life-giving moisture. That's exactly what we want. But if you grab that sponge and wring it out with all your might, you'll crush it flat and get every last drop.
That's what aggressive compression does. It just flattens the dynamic energy, squashing the delicate high-frequency details and transients that give a vocal its sparkle and presence.
Here's the thing: the goal of compression isn't to make the vocal insanely loud; it's to make it consistently audible. With vocals, a subtle touch is almost always the right move. You just want to gently tame the peaks of the performance so the quieter, more intimate parts can be heard clearly without getting lost in the mix.
A great starting point for gentle vocal compression is a slow attack time paired with a medium release. This lets the initial punch of each word—the transient—cut through before the compressor engages, preserving the natural energy of the performance.
When compression is done right, you shouldn't really "hear" it clamping down. Instead, you should just feel the vocal sitting more comfortably in the track, never jumping out at you or getting buried.
Try aiming for around 3-6 dB of gain reduction on only the loudest phrases. If your compressor's needle is pinned way past that, you're probably crushing the life out of the track and bringing back that muffled, lifeless quality you worked so hard to get rid of. If you're new to this powerful tool, getting a handle on what compression does in music is a fantastic next step.
Now, sometimes in our quest for clarity, we can get a little too happy with the high-frequency EQ boost. This can create a whole new problem: harsh sibilance. I'm talking about those sharp "s," "sh," and "t" sounds that can become genuinely painful and distracting to listen to.
The amateur move is to just reach for an EQ and pull down the entire high-end. But this throws the baby out with the bathwater, making the vocal sound muffled all over again. The professional tool for this job is a de-esser.
A de-esser is basically a specialized compressor that only listens to and acts on a very narrow frequency band—typically where sibilance lives, somewhere between 5 kHz and 8 kHz.
It works like a tiny, invisible surgeon. It ducks the volume only when one of those piercing "s" sounds pops up, leaving the rest of the vocal's beautiful high-frequency content completely untouched. This lets you keep all that "air" and presence you wanted while precisely taming any harshness. The result? A vocal that's crisp and clear, not piercing.
You can spend hours twisting EQ knobs and wrestling with compressors, but the vocal just won't come forward. It still sounds like it's trapped behind a curtain. When you hit this wall, it's time to look past the plugins and get back to the source—the singer.
Technology is an incredible enhancer, but it can only work with what you give it. It can't invent clarity that wasn't there in the first place.
Your body is the original instrument. The way a singer holds themselves, how they breathe, and how they shape their mouth and throat all carve out the vocal tone long before it ever hits a microphone. Think of it like an acoustic guitar: the vocal cords are the strings, sure, but the throat, mouth, and nasal passages are the hollow body. That's where the sound bounces around, resonates, and gets all its unique character.
A tense throat or bad posture literally shrinks that resonant space, killing the sound right at the source. This creates a muffled, choked quality that no amount of software can truly fix.
Good singing is all about creating a wide-open highway for the sound to travel through. What often happens, especially when a singer is straining for a high note, is they clench their jaw and tighten their throat. This physically strangles the sound, cutting off the very high frequencies that give a vocal its presence and air.
The physical mechanics of the vocal tract are everything. Any physical blockage or just plain bad habit can lead to a muffled sound. It's not just a technique thing, either; medical conditions known as resonance disorders can throw off this balance and make speech sound muffled. That really drives home just how critical the physical side of singing is. If you're curious about the science, ASHA has a great breakdown on how resonance disorders affect vocal clarity.
A great trick for any singer is to remember that singing should feel more like a mental effort than a physical one. Instead of pushing and straining, just visualize the sound projecting forward, like it’s coming from your forehead, not your throat.
This simple mental shift can trick the right muscles into relaxing, opening up the sound and getting rid of that "trapped" tone.
When you nail the performance from the start, you capture a clear, open, and vibrant sound. That makes every single step that comes after—EQ, compression, effects—infinitely easier and more effective.
Even after you've checked all the usual suspects, some specific issues can still leave you scratching your head. Let's dig into a few of the most common questions that pop up when producers are chasing that perfect vocal clarity.
You bet, though it's not the first place most people look. A busted or super cheap XLR cable can absolutely kill your tone.
Think of it this way: the high-frequency content—all that "air" and crispness in a vocal—is fragile. If the cable's internal wiring is damaged or the shielding is garbage, that high-end information can get lost, especially if you're using a long cable run. It's like a tiny, unwanted filter that just shaves off the sparkle. If you're at your wit's end, swapping out the cable is a quick and easy sanity check.
Ah, the classic "it sounded good in the studio" problem. This all comes down to one crucial word: translation.
Your headphones are lying to you. Well, maybe not lying, but they have their own sound signature. Many popular studio headphones have a built-in high-frequency boost that can trick your ears into thinking the vocal is way brighter and clearer than it actually is.
Then you play it in your car or on a buddy's Bluetooth speaker, and reality hits. That system doesn't have the same flattering EQ curve, so you're hearing the real mix for the first time. This is exactly why you have to check your mix on multiple systems before you call it done.
Your goal isn’t to make a perfect mix for one set of speakers. It's to make a mix that sounds consistently good on all of them. Always reference on different systems before you sign off on a master.
If you've already carved out the mud from the vocal track itself and it's still not working, the problem isn't the vocal—it's everything else. You're dealing with a classic case of frequency masking.
This happens when other instruments are fighting for the same sonic real estate, essentially smothering your vocal. The main culprits are usually in the low-mids. Look at your synths, chunky electric guitars, or even the top end of your bass.
Instead of boosting the vocal more, grab an EQ and start making small, surgical cuts on those other instruments. Focus on the 200-500 Hz range. By scooping a little bit out of a competing synth or guitar, you create a "pocket" for the vocal to sit in. It's often way more effective than just turning the vocal up.
Ready to make sure your music hits just as hard in the car as it does in the studio? CarMaster is an AI mastering service built specifically to fix these translation issues, optimizing your tracks for car stereos so your vocals never get lost. Get a free preview instantly and hear the difference yourself. Protect your song from sounding bad in the car with CarMaster today.

.png)